The HDanywhere app is a new product designed to control the HDanywhere family of products. Because mHub 2K systems have been available to purchase for over a year prior to the launch of the app, they require some initial configuration that will allow them to now be controlled by the app. If you own an mHub 2K please go through steps 1-3 and follow the instructions exactly as described.
If you experience problems or difficulties at any stage in the process, please call 01684 575 324 and speak to our technical support team
Step 1 – Configure your computer’s IP range
- The first thing you need to know is your home network IP range, if you know your gateway address (for instance 192.168.1.1) then this means that all devices on your home network will have addresses within this range (192.168.1.20, 192.168.1.150 etc) and you should be looking to put your mHub somewhere within this range (make sure there is no device currently on this IP address)
- Your PC or laptop will need to have it’s IPV4 range configured to be within the same range as your mHub 2K initially.
- mHub 2K’s IP address is pre-configured as 192.168.0.100. Configure your laptop’s IPV4 range to be the same by navigating to this menu on your PC / laptop:
->Network and sharing center
—>Ethernet
—–>Properties
——->Internet Protocol Version 4 (TCP/IPv4)
———>Properties
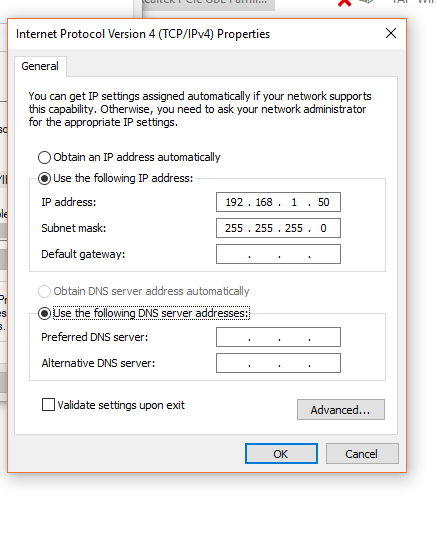
Configure your settings as shown in the image, this will change your computer IP range. Please note that you will temporarily lose internet connectivity, if your PC’s previous IP range was different from this.
Step 2 – open the mhub controller software. You can download this here.
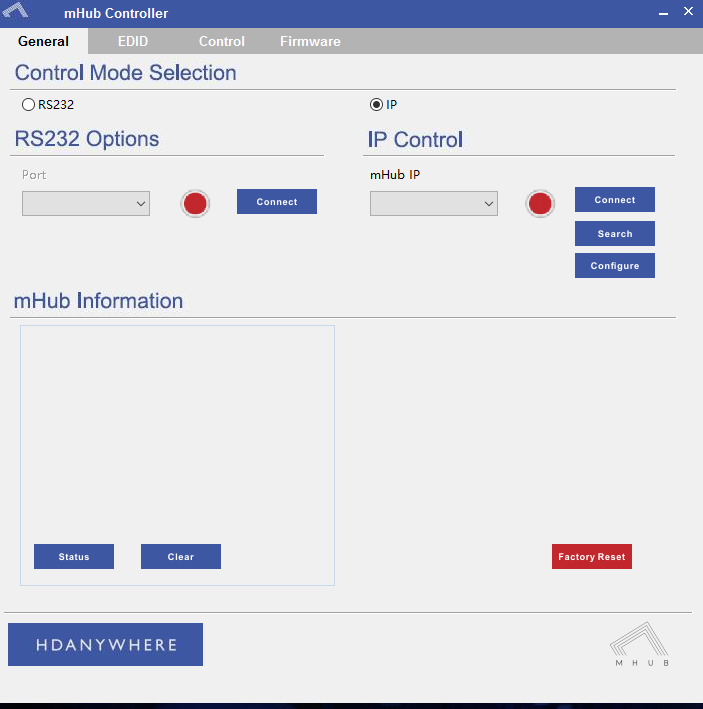
In the mHub controller software select IP, as shown above. Then press the ‘search’ button, this should locate your mHub 2K system. Press ‘connect’ the red circular button in the IP control window should turn green.
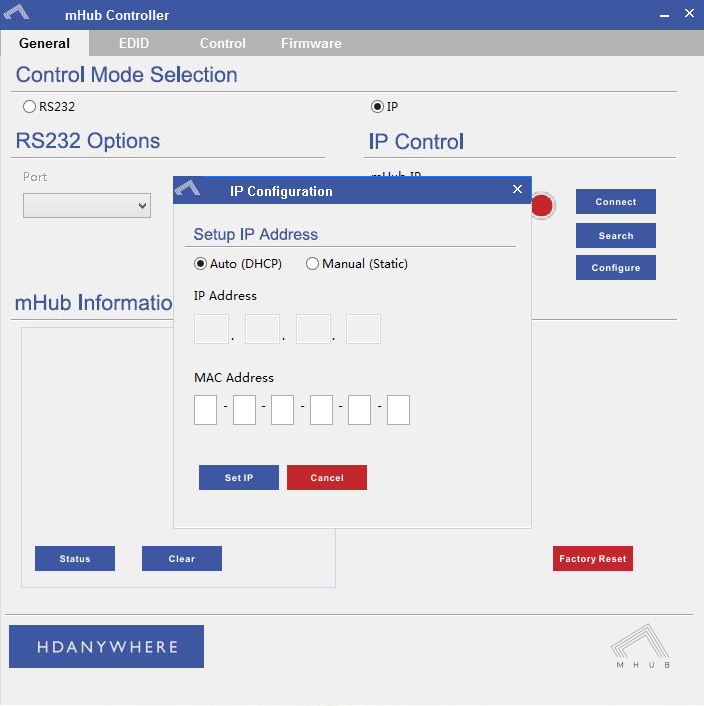
Press the ‘configure’ button a box called IP configuration will now pop up, as shown above. Select the Manual (static) option, and then enter an IP address within your home network range that is not currently being used. Now click ‘Set IP’. Your matrix is now on your home network and will be able to be found by the HDanywhere control app.
Step 3
Now go back into your IPV4 settings (via the menu described in Step 1). Set your PC or laptop’s IPV4 settings to what they were before
Step 4
You should now be able to locate your matrix from the HDanywhere control app