Setting up WiFi and Zone Processors
WiFi on Zone Processor Setup Guide
This guide will walk you through the process of changing your Zone Processor (ZP) device’s network connection from a wired Ethernet setup to a wireless (WiFi) setup.
This process involves three main phases:
- Initial Setup: Configuring the device while it’s connected via Ethernet.
- Temporary AP Mode: Using the device’s own Access Point to connect to it directly.
- Final WiFi Mode: Connecting the device to your building’s main WiFi network.
Part 1: Initial Wired Setup
Before you can configure the WiFi, the ZP device must first be set up on your network using an Ethernet cable.
- Connect the ZP device directly to your router or network switch using an Ethernet cable.
- Power on the device.
- On a computer connected to the same network, you will need to find the ZP’s current IP address.
Note: You can typically find this by using the uControl app or a network scanner.
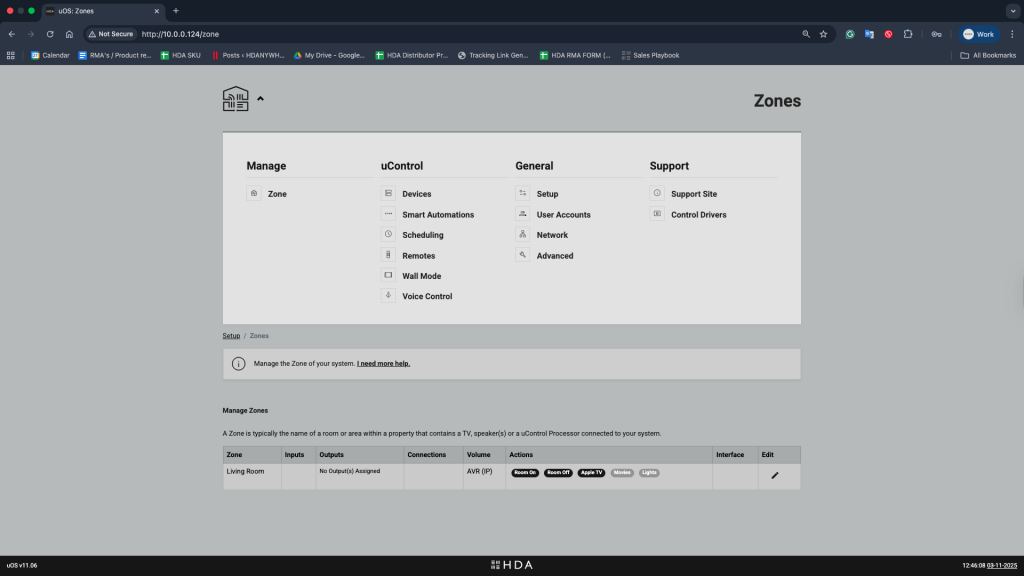
- Open a web browser and type that IP address into the address bar to access the device’s web interface (GUI).
Part 2: Switch to Access Point (AP) Mode
Next, you will temporarily turn the ZP device into its own wireless hotspot.
- In the ZP’s web interface, navigate to the “Network” section.
- Find the “Device Mode” setting.
- Change the mode from Ethernet to Access Point.
- Save the settings.

Part 3: Connect to the ZP’s Temporary Network
Your computer will lose connection to the device when it restarts. You must now connect to the new temporary network it is broadcasting.
- On your computer or mobile device, open your WiFi settings.
- Look for a new network name (SSID) broadcast by the ZP device. It starts with
HDA-ZP(Example:HDA-ZP5-146D).
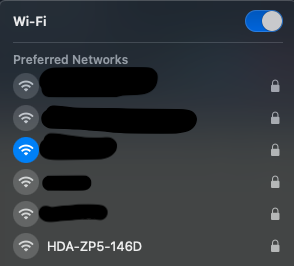
- Connect to this network. You will be prompted for a password.
Password:hdanywhere - Your device is now connected directly to the ZP, not to your main network.
Part 4: Switch to WiFi
Now that you are connected to the ZP’s temporary network, you will give it your main WiFi network’s details.
- Open a web browser.
- In the address bar, type:
192.168.100.1
This is the ZP’s default IP address when it is in Access Point mode. - Once the web interface loads, navigate to the “Network” section again.
- Change the “Device Mode” from Access Point to WiFi.
- Save the settings.
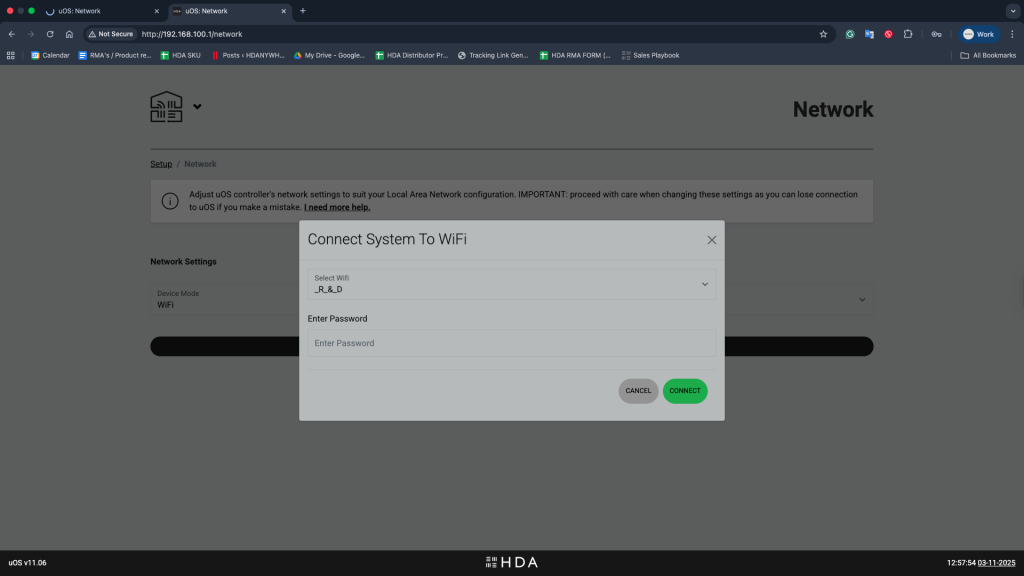
- Enter your WiFi Network and password then Save the settings again. The device will disconnect you from its temporary network.
Part 5: Locate Your Device on WiFi
Once the ZP device reboots, it will be connected to your network via WiFi. It will have a new IP address assigned by your main router.
You must now find this new IP address to access the device:
- Using the App: The simplest method is to use the uControl app, which has a built-in network scanner to find the device.
- Using Your Router: You can log back into your router’s administration page and check the “DHCP Client List” for the ZP device to see its new IP.
- Using a Network Scanner: You can use a third-party application (like Fing on mobile or Angry IP Scanner on a desktop) to scan your network and locate the ZP’s new IP address.
Once you have the new IP address, you can use it to access the ZP’s web interface as normal. Your device is now successfully connected via WiFi.