Search by Support Category: MHUB-OS
DO NOT RESET YOUR SYSTEM IF YOU DO NOT KNOW WHAT YOUR HDA DEVICE DOES:
Your HDA hardware is an integrated system and very similar to a central heating boiler.
It maybe controlling your AV sources, displays, speakers, lights etc. If you reset your system and you do not know how to restore it yourself then it could render your AV unusable.
Is your system managed by a HDA Pro Installer?
If your system has been built and serviced by a HDA Pro Installer then please contact them first before resetting your device. This is especially important if they are servicing your system. If you proceed with a system reset then your HDA Pro can reserve the right to charge a call out fee to restore your system to a working state.
Resetting your system
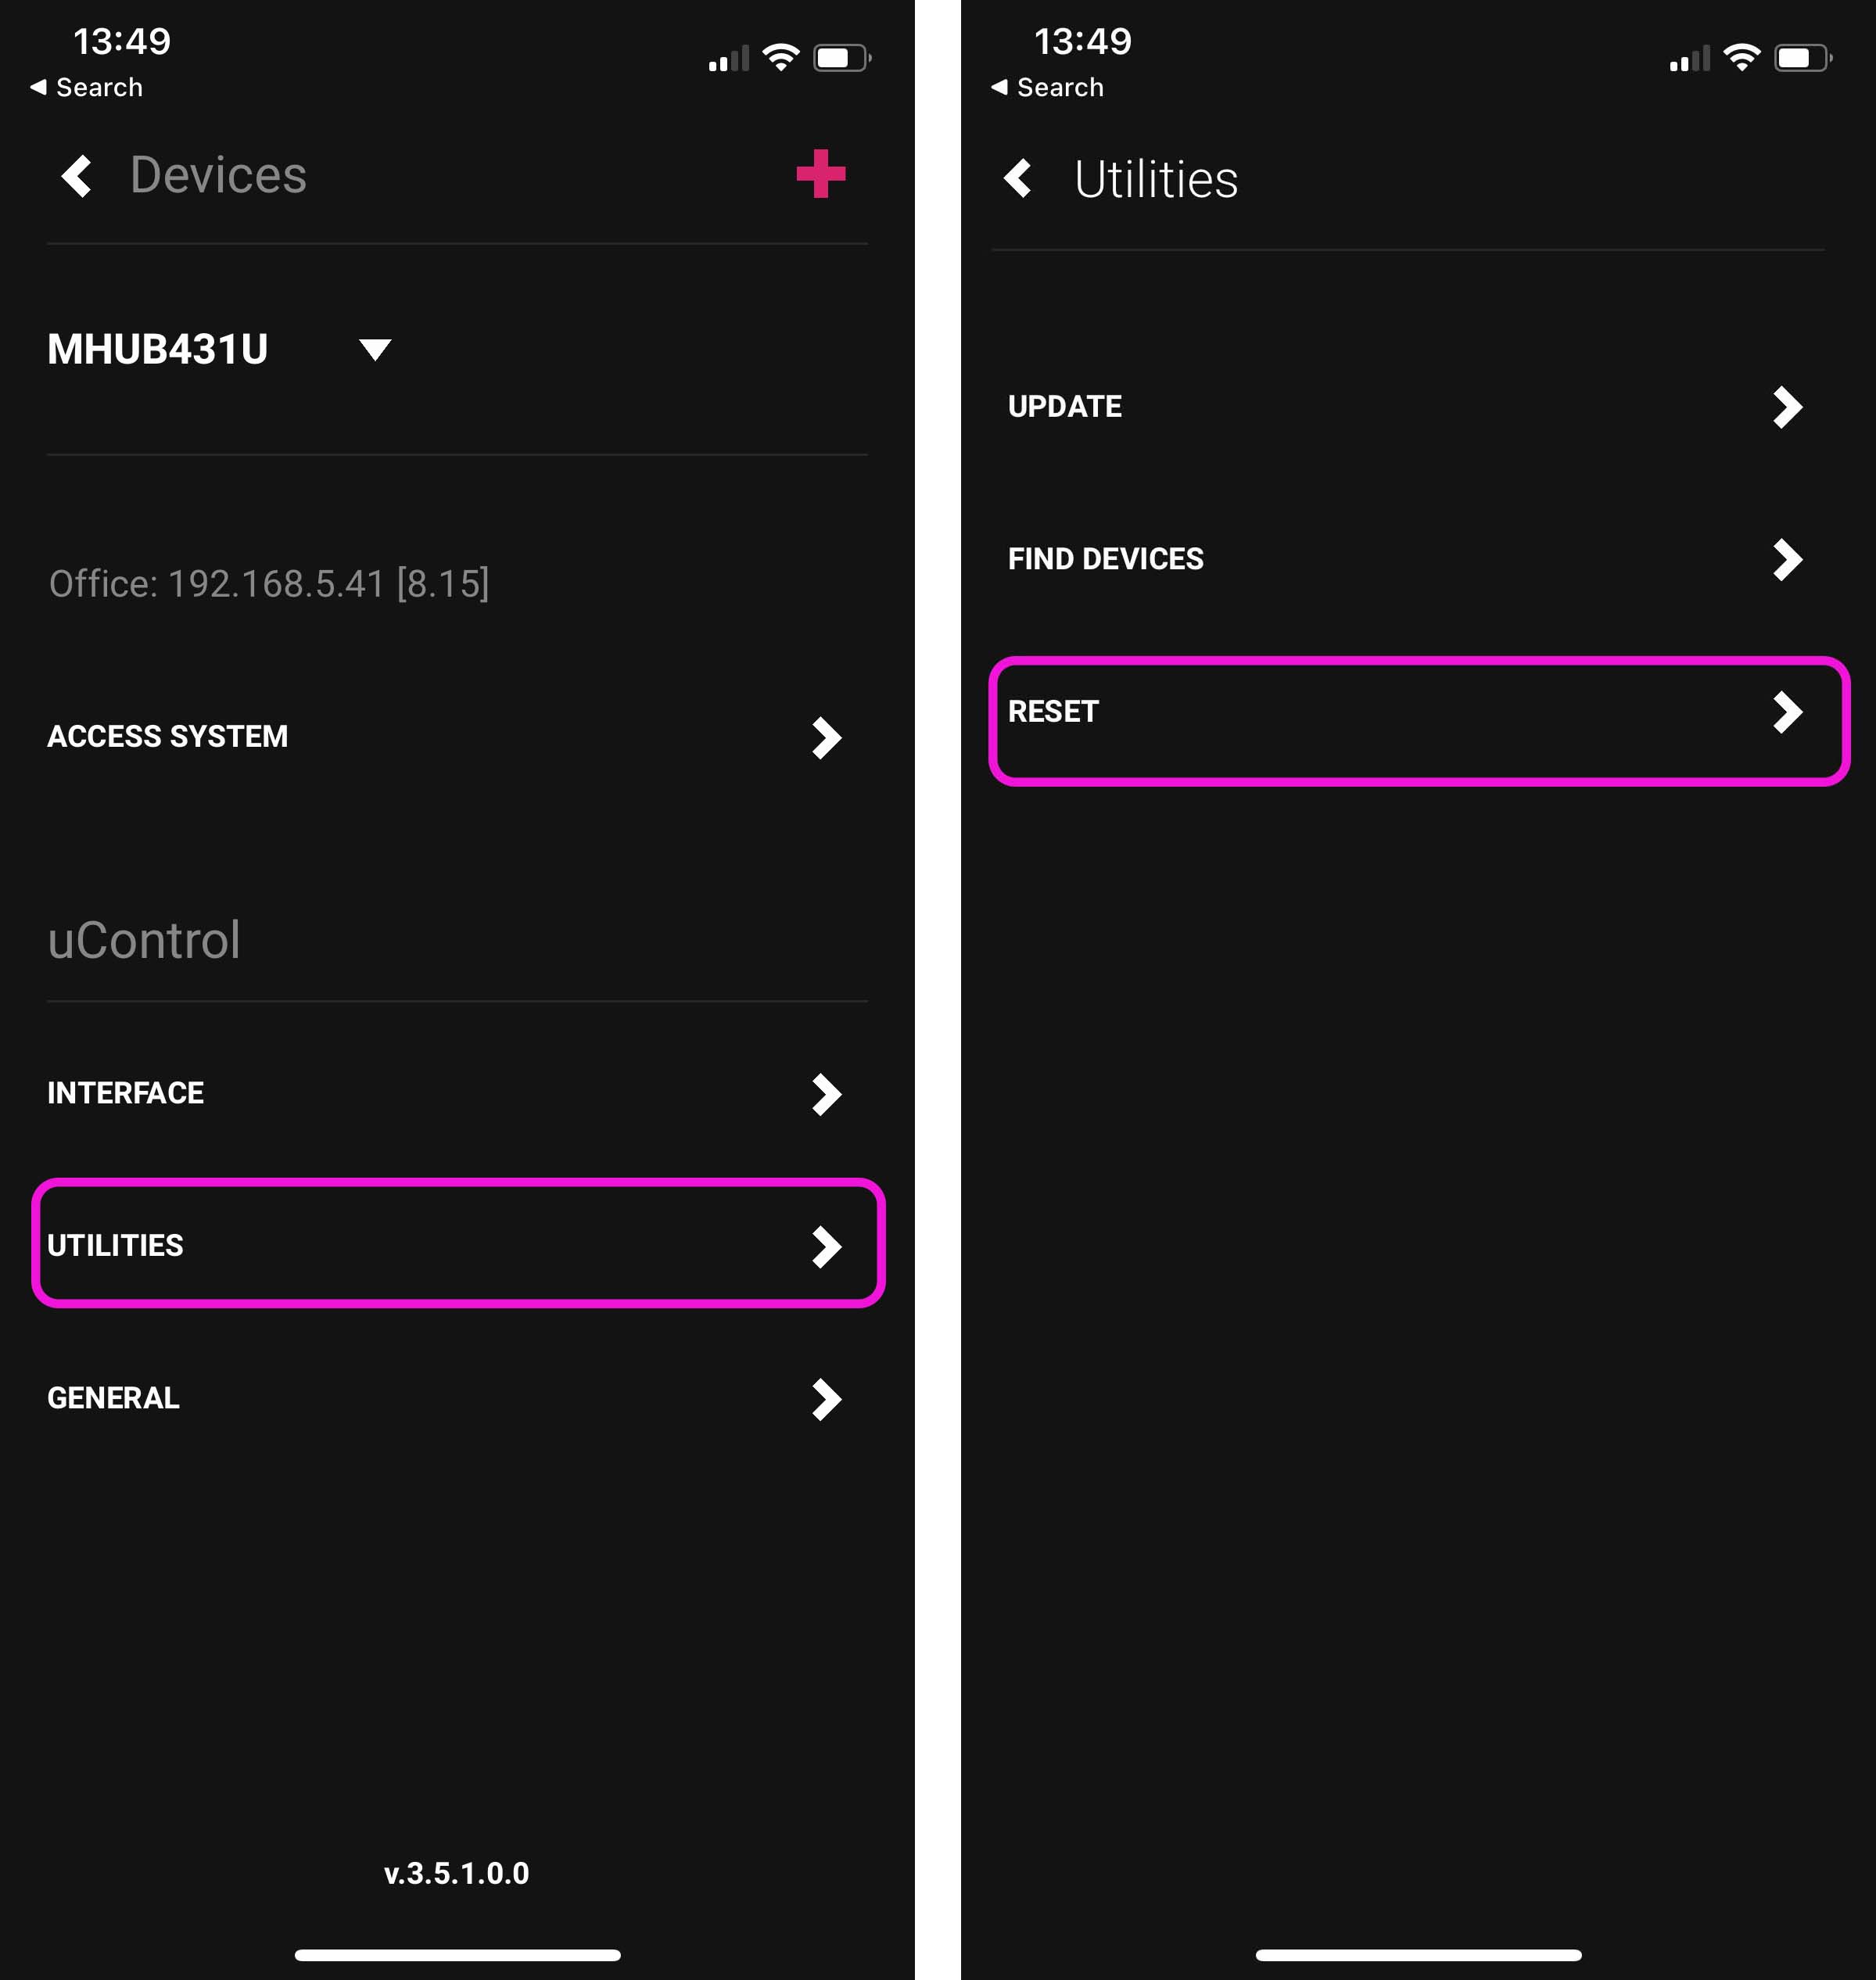
If you are already connected to a HDA system:
uControl menu (top left menu icon) > Settings Cog (bottom left) > Utilities > Reset
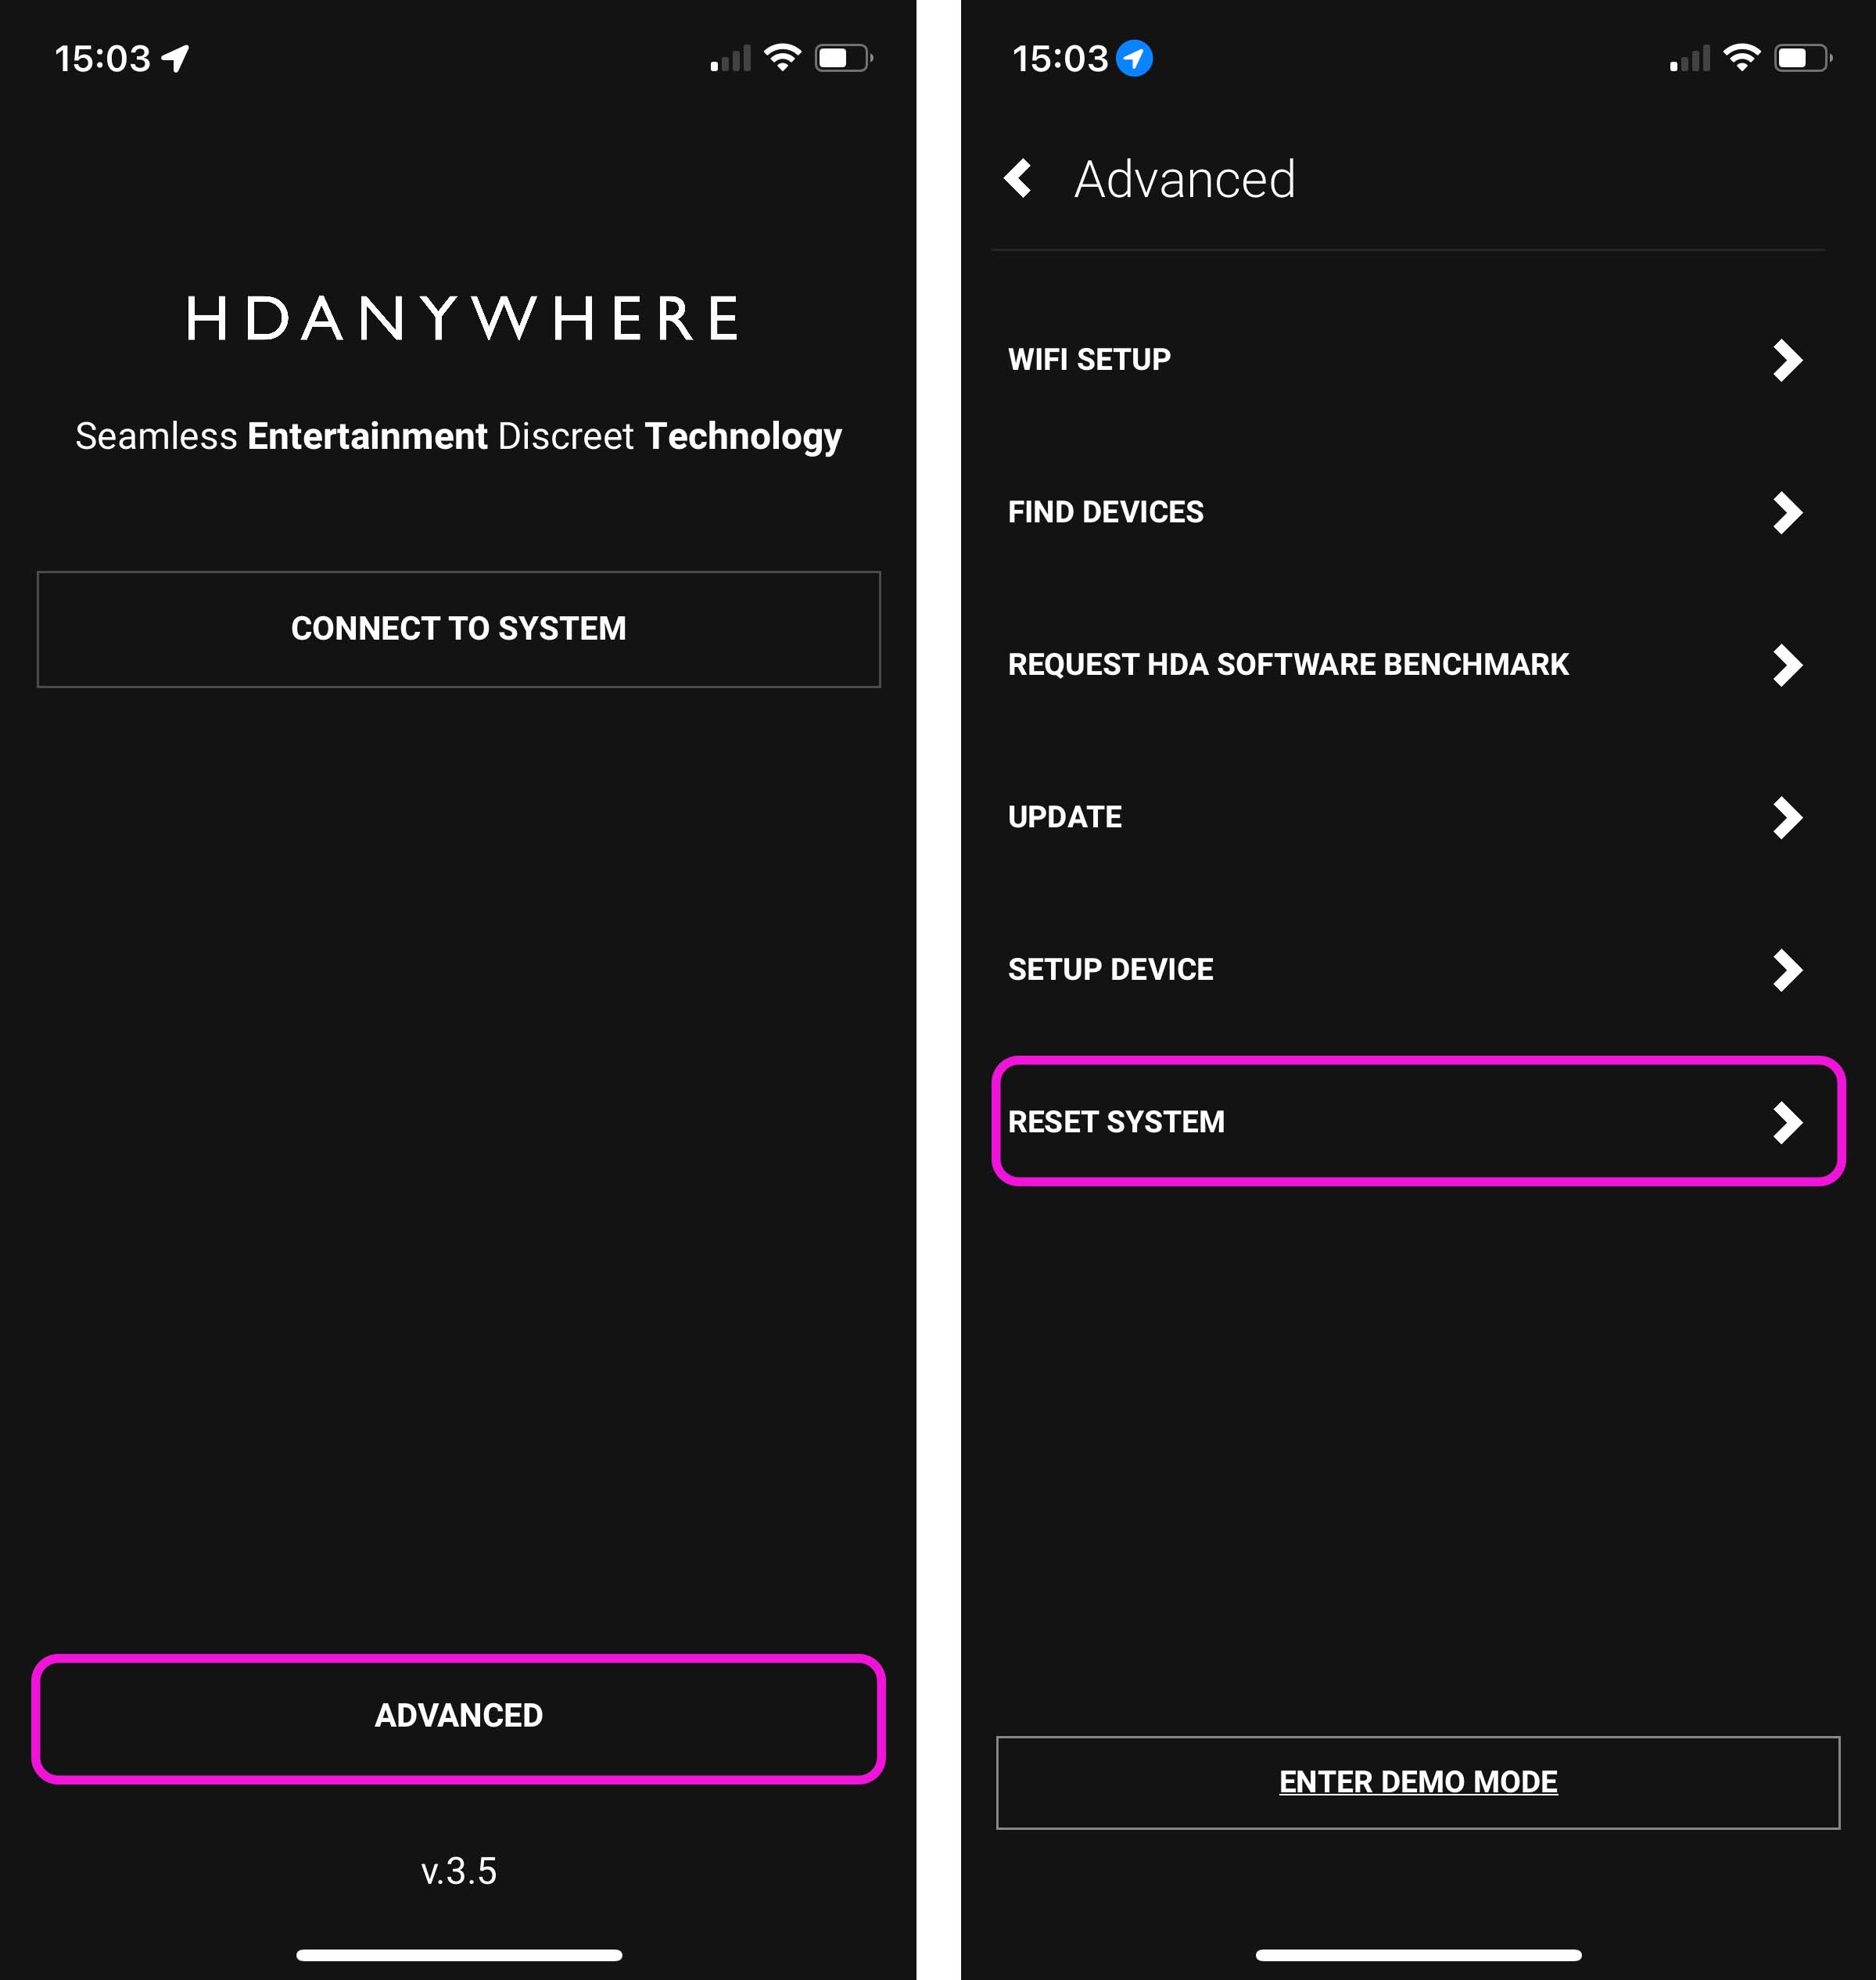
If you are not connected to any system:
uControl Splash Screen > Advanced > Utilities > Reset
Tapping on reset will not work. You will need to tap the reset button 10 times in order to unlock the reset process. Follow instructions inside the app to continue with the system reset.
If your MHUB is marked with “TPC” then it is capable of passing a HDR picture to your display. There are a number of reasons why HDR may not be fed through your HDA device. This support post aims to troubleshoot the most common reasons and how to resolve them.
Important: there are different versions of HDR, make sure your display supports the format your source is outputting!
There are multiple variants of HDR such as HLG, HDR10+ and Dolby Vision, please ensure your display supports the relevant HDR technology.
When connecting your HDR enabled source and display to a HDA system you may need to adjust some settings to get it to work.
- First, disconnect the source and connect it directly to your display. Do you get HDR?
- Ensure you are using High Speed HDMI Cables, this is important as long HDMI cables (over 5m) unless Active or Fibre will not work.
- Was you HDA device manufactured before 2019? Does it have TPC markings or 18G/18Gbps on it anywhere? If it doesn’t then there is a good chance that your HDA device does not support HDR as it was made before the specification was finalised.
- Does your HDA device support scaling? If so please ensure it is set to bypass.
- Copy or set a custom EDID directly from your display. This post explains how to copy EDID directly from your display.
Some devices no longer have built in IR receivers. To enable them to be used with the uControl app you can add a third party device called FLIRC. This connects to a source device via USB and turns IR codes into control commands the source device recognises.
There are two Flirc devices that we are compatible with, the first part of this guide is for the older model which can be found here. The second part of this guide is for the Flirc device that is specifically for the Amazon Fire TV and can be found here.
Regular Flirc
If you are using the older model of Flirc you will need an OTG cable like this -

Install the Flirc software on your computer and install this profile onto your laptop/PC – Fire TV
Load up the Flirc software and in the top left click File, and then Load Configuration and choose the Fire TV profile you have just downloaded.
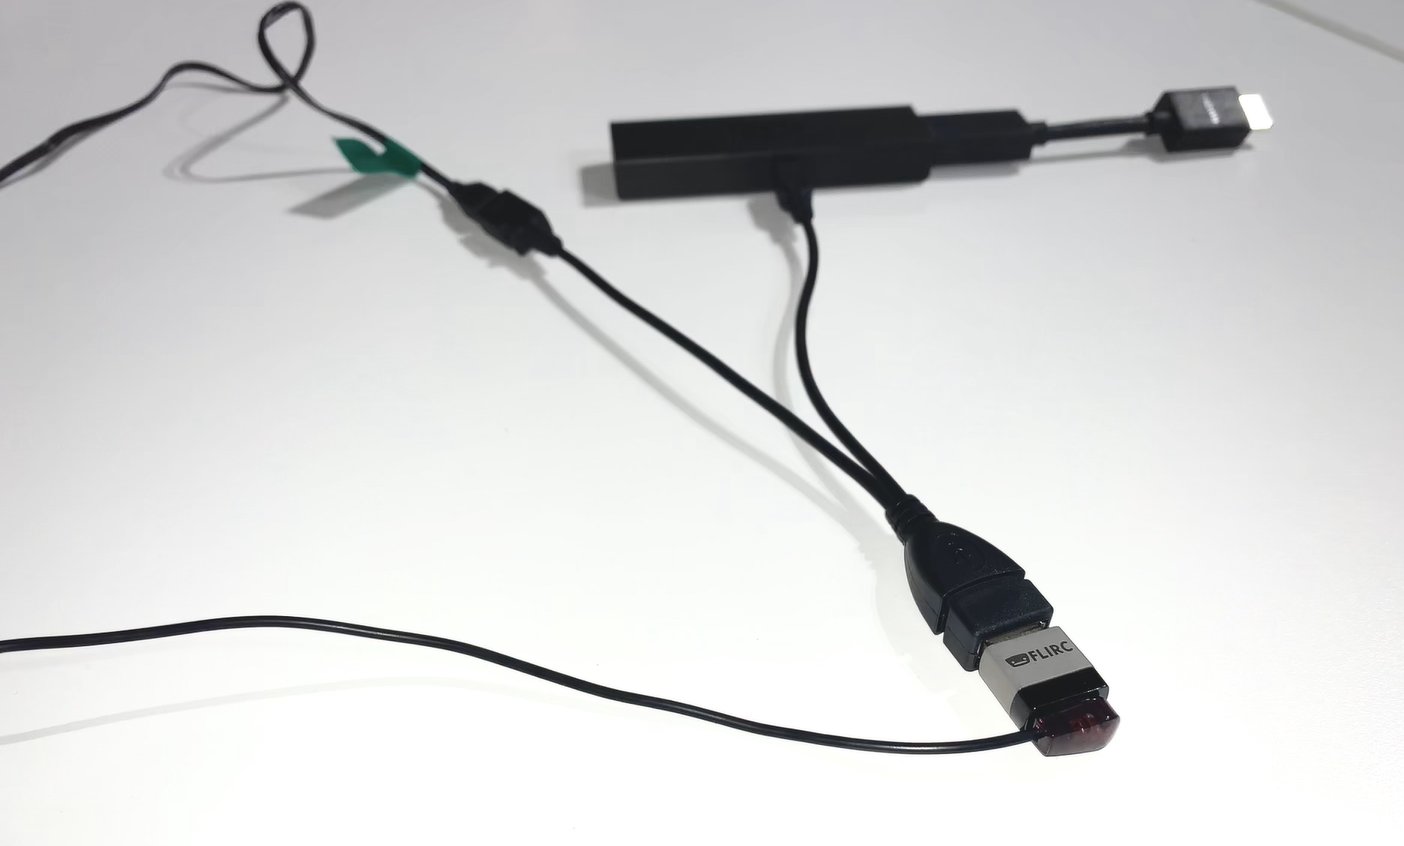
Remove your Flirc from the laptop/PC and connect it to the female USB port on the OTG cable. Then taking the male micro USB section of the cable plug it into the Firestick. Lastly plug your power into the female micro USB port.
Next place the IR transmitter from you HDANYWHERE device on or near to the Flirc. You may need to move it around to test which positioning works best, but we recommend taping it to the top of the Flirc.
Once this is done you can install the FireTV(FLIRC) IR pack and control your Amazon device with uControl.
Amazon Fire TV Flirc
If you are using the Fire TV specific Flirc you will not need the OTG cable, but will need to install the Flirc software on your computer and install this profile onto your laptop/PC – Fire TV
Load up the Flirc software and in the top left click File, and then Load Configuration and choose the Fire TV profile you have just downloaded.
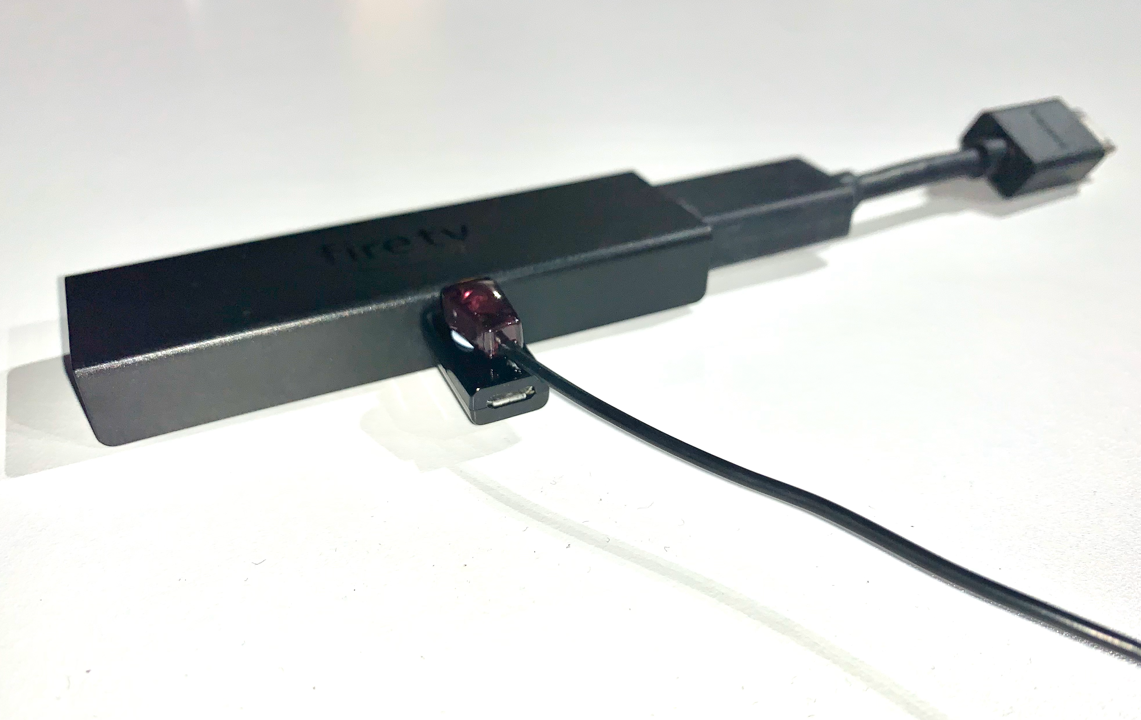
Remove the Flirc from your laptop/PC and connect the power lead to the micro female USB port on the Flirc. Plug the other side of the Flirc (male USB) into the side of the Firestick, and then plug the Firestick into your desired input.
Lastly place the IR transmitter from you HDANYWHERE device on or near to the Flirc. You may need to move it around to test which positioning works best, but we recommend taping it to the side, adjacent to the Flirc.
Once this is done you can install the FireTV(FLIRC) IR pack and control your Amazon device with uControl.
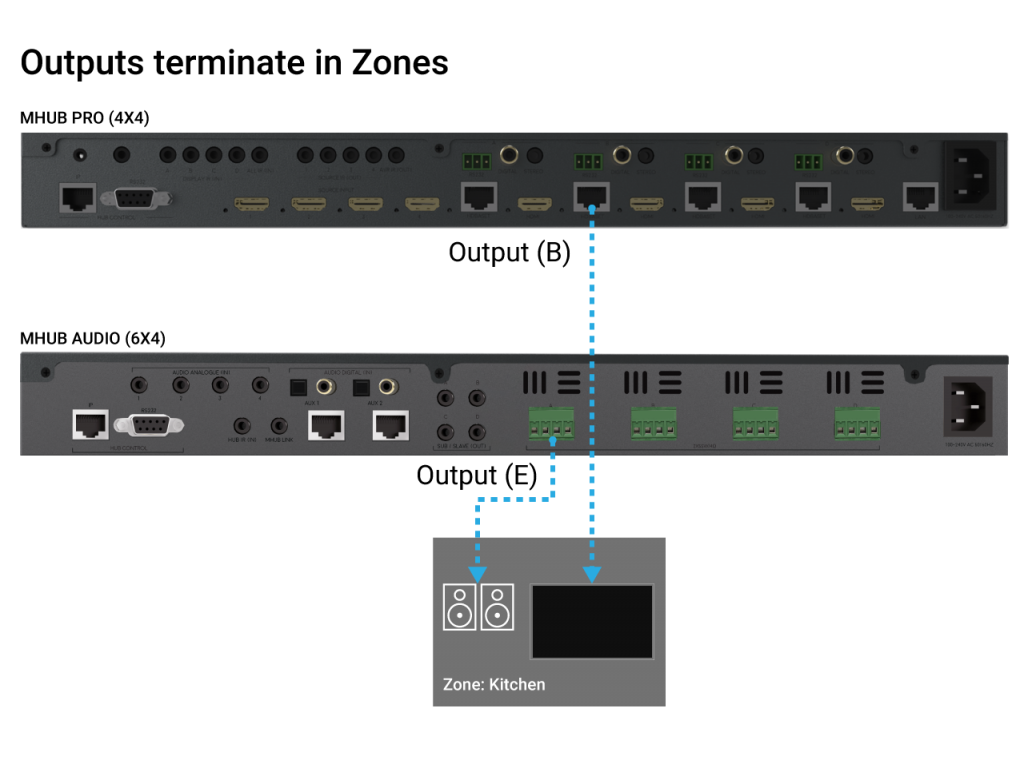
Zones define a physical space in a property where outputs from MHUB terminate.
A Zone can include a maximum of 1 video output and a maximum of 4 audio outputs. For example, you can create a zone called “Kitchen” and assign 1 video and 1 audio output to it to provide you with viewable TV and sound. A Zone must contain at least 1 output from an MHUB for it to be addressable for control. Note: outputs can not be shared or split to more than 1 Zone.
The first boot process for MHUB-OS has remained largely unchanged with the exception of zones.
The slideshow below walks you through the steps within MHUB’s first boot process and how to setup zones to refect the different rooms or areas within you property.
If you wish to configure a stacked system please watch this video – Creating a MHUB stacked system.
You should be able to complete the process in under 10 minutes.
MHUB-OS first boot steps are as follows:
- EULA and Privacy policy
- Name your MHUB
- Name your source devices
- Create zones
- Assign outputs to zones
- Confirm zones
- Connect MHUB to HDA Cloud
- Complete setup
HDANYWHERE(HDA) recommends that every MHUB install goes through its first boot process to ensure that the MHUB is setup correctly.
How long does the process take to complete
If you have an update to install then then first boot usually take about 10 minutes. If there is no update you can normally finish the entire process and have an operational MHUB system well within 5-7 minutes.
Yes. You do not need to access MHUB-OS if you don’t want to. But this is only recommended if you intend to control you MHUB via a control system. You will also miss the opportunity to increase your warranty period and open your MHUB to additional features or services.
I don’t want to use MHUB-OS or go through the first boot process, will MHUB work like a normal?
Yes. You do not need to access MHUB-OS if you don’t want to. But this is only recommended if you intend to control you MHUB via a control system. You will also miss the opportunity to increase your warranty period and open your MHUB to additional features or services.
I made a mistake in the first boot process, can I go back or make a change?
Yes. You can go all the way back to the update step and correct any incorrect information you entered. Alternatively, you can also access MHUB-OS (after you have completed first boot) and change anything then.