Search by Support Category: HDBaseT
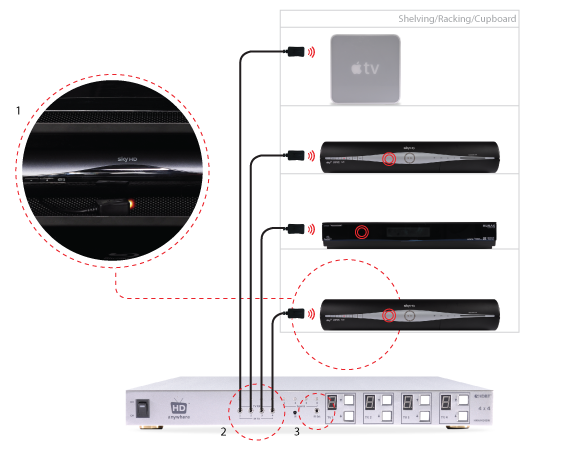
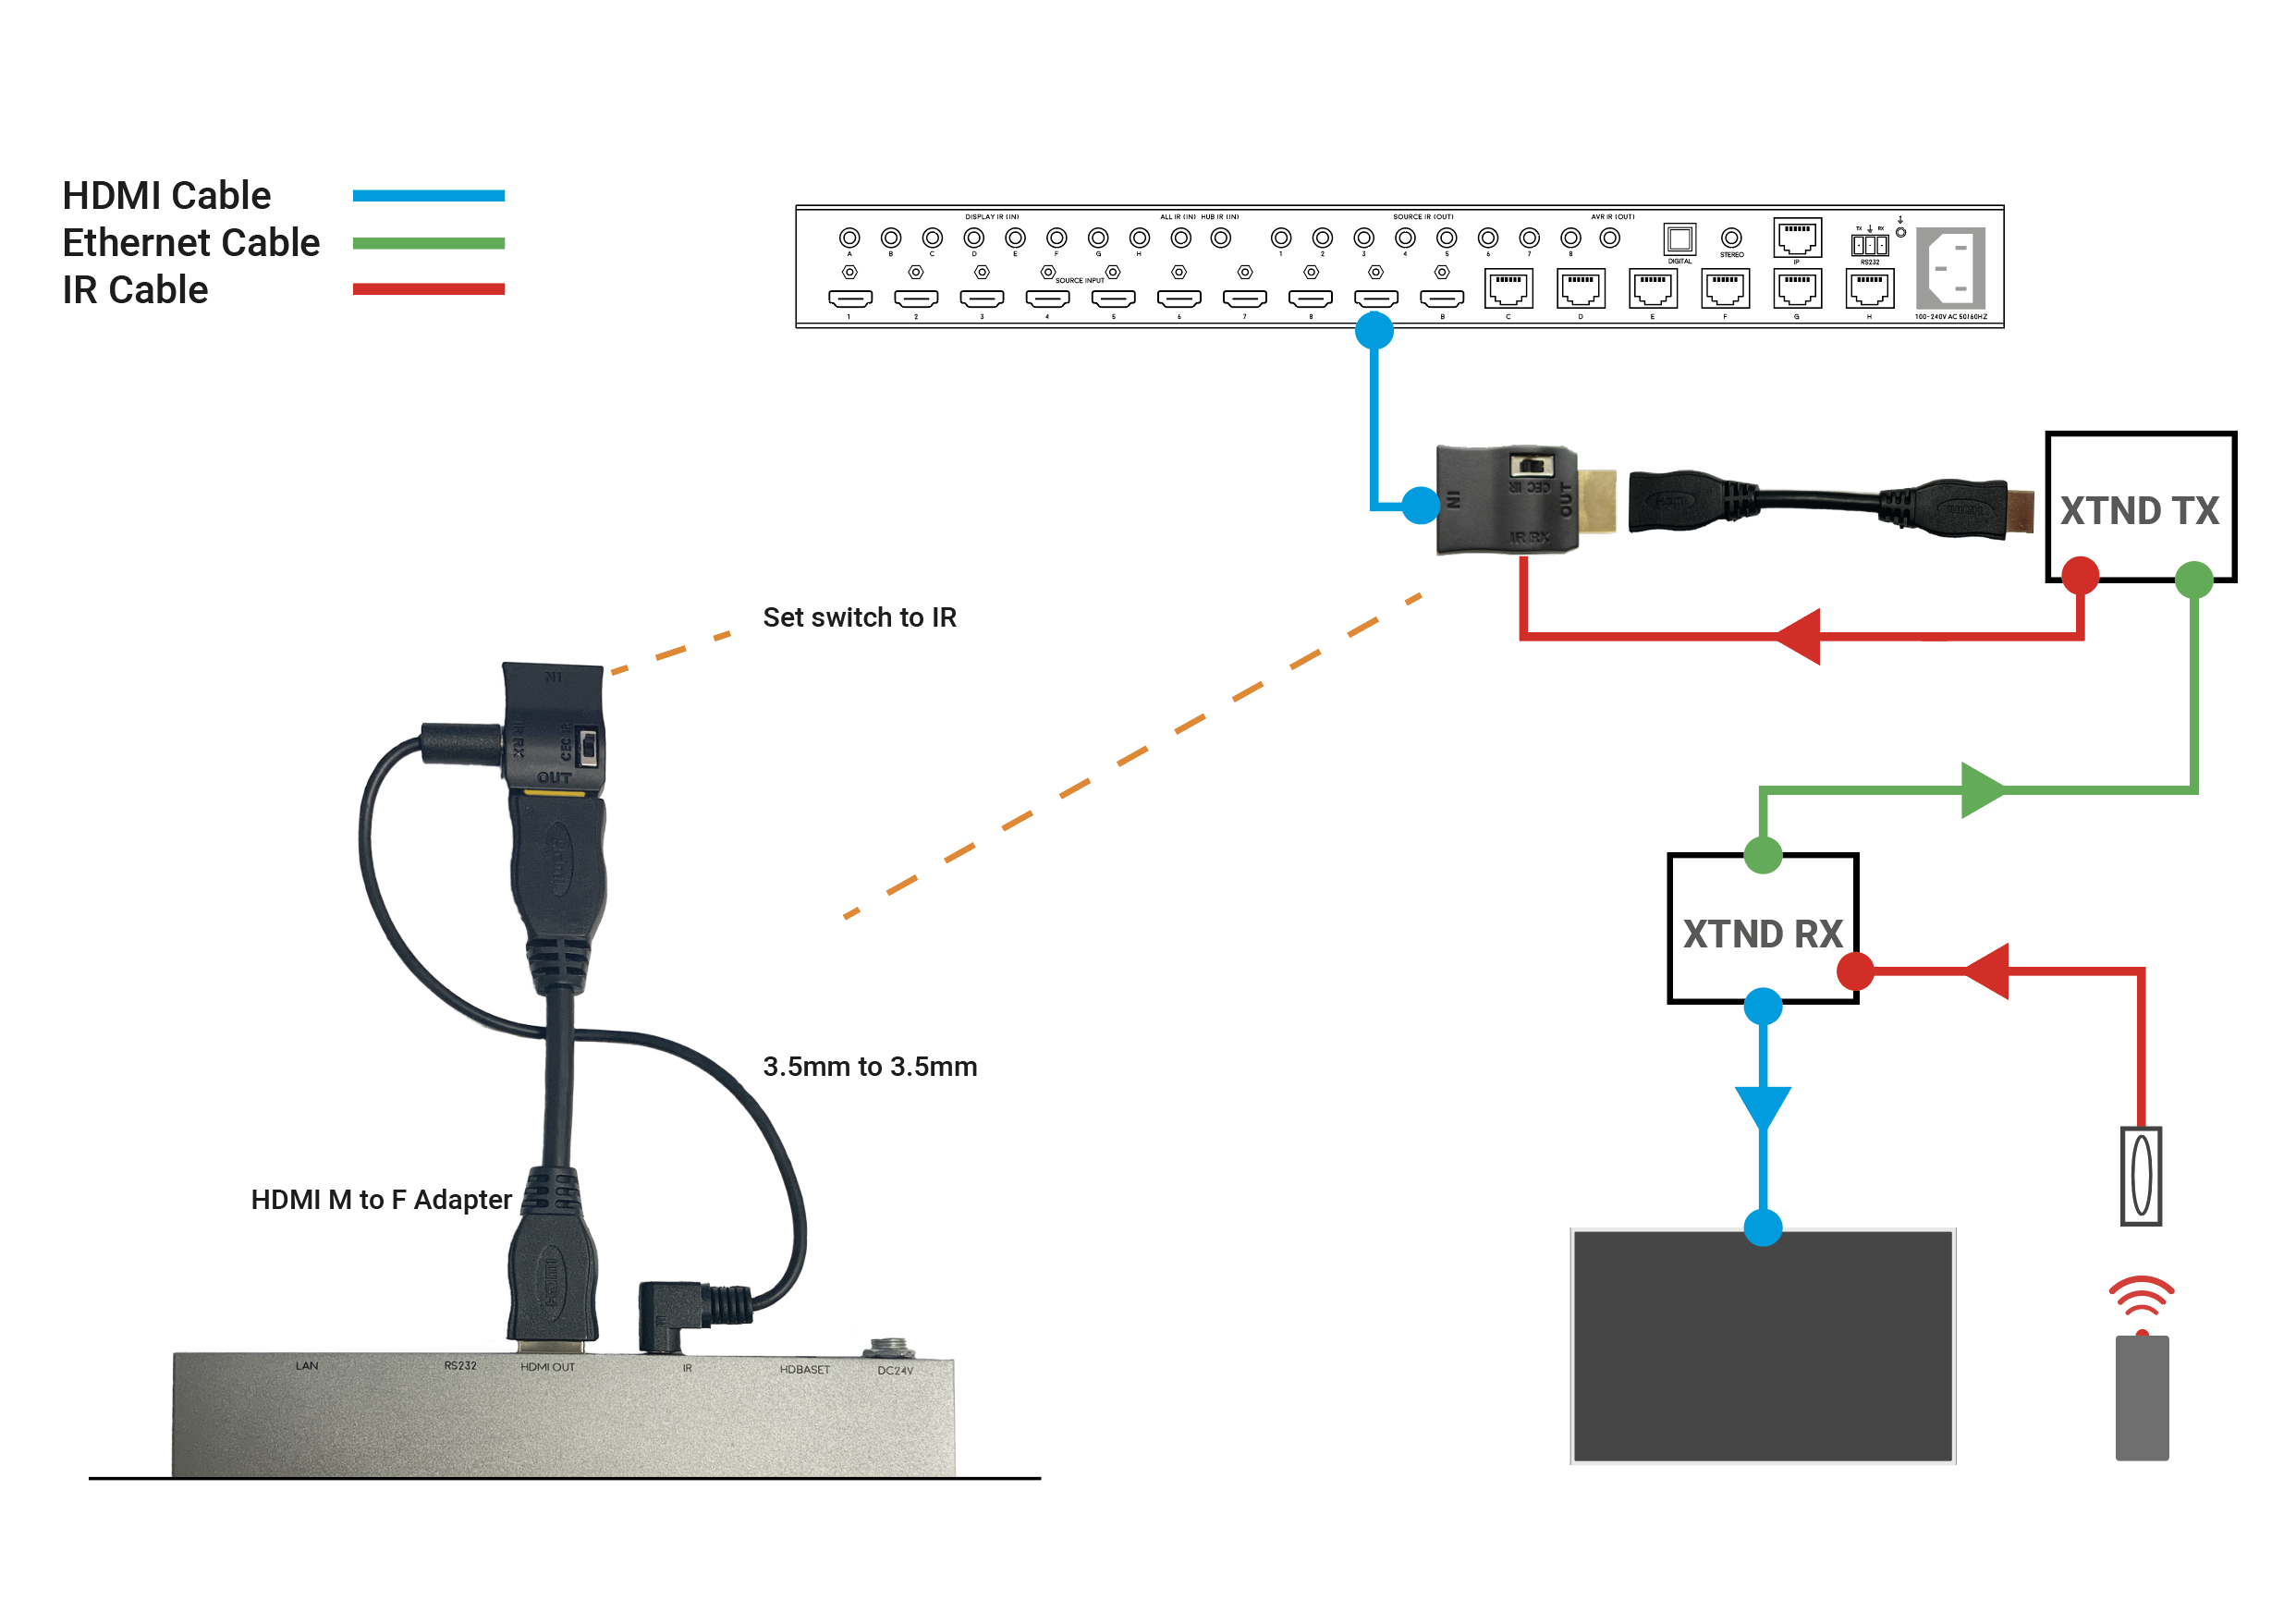
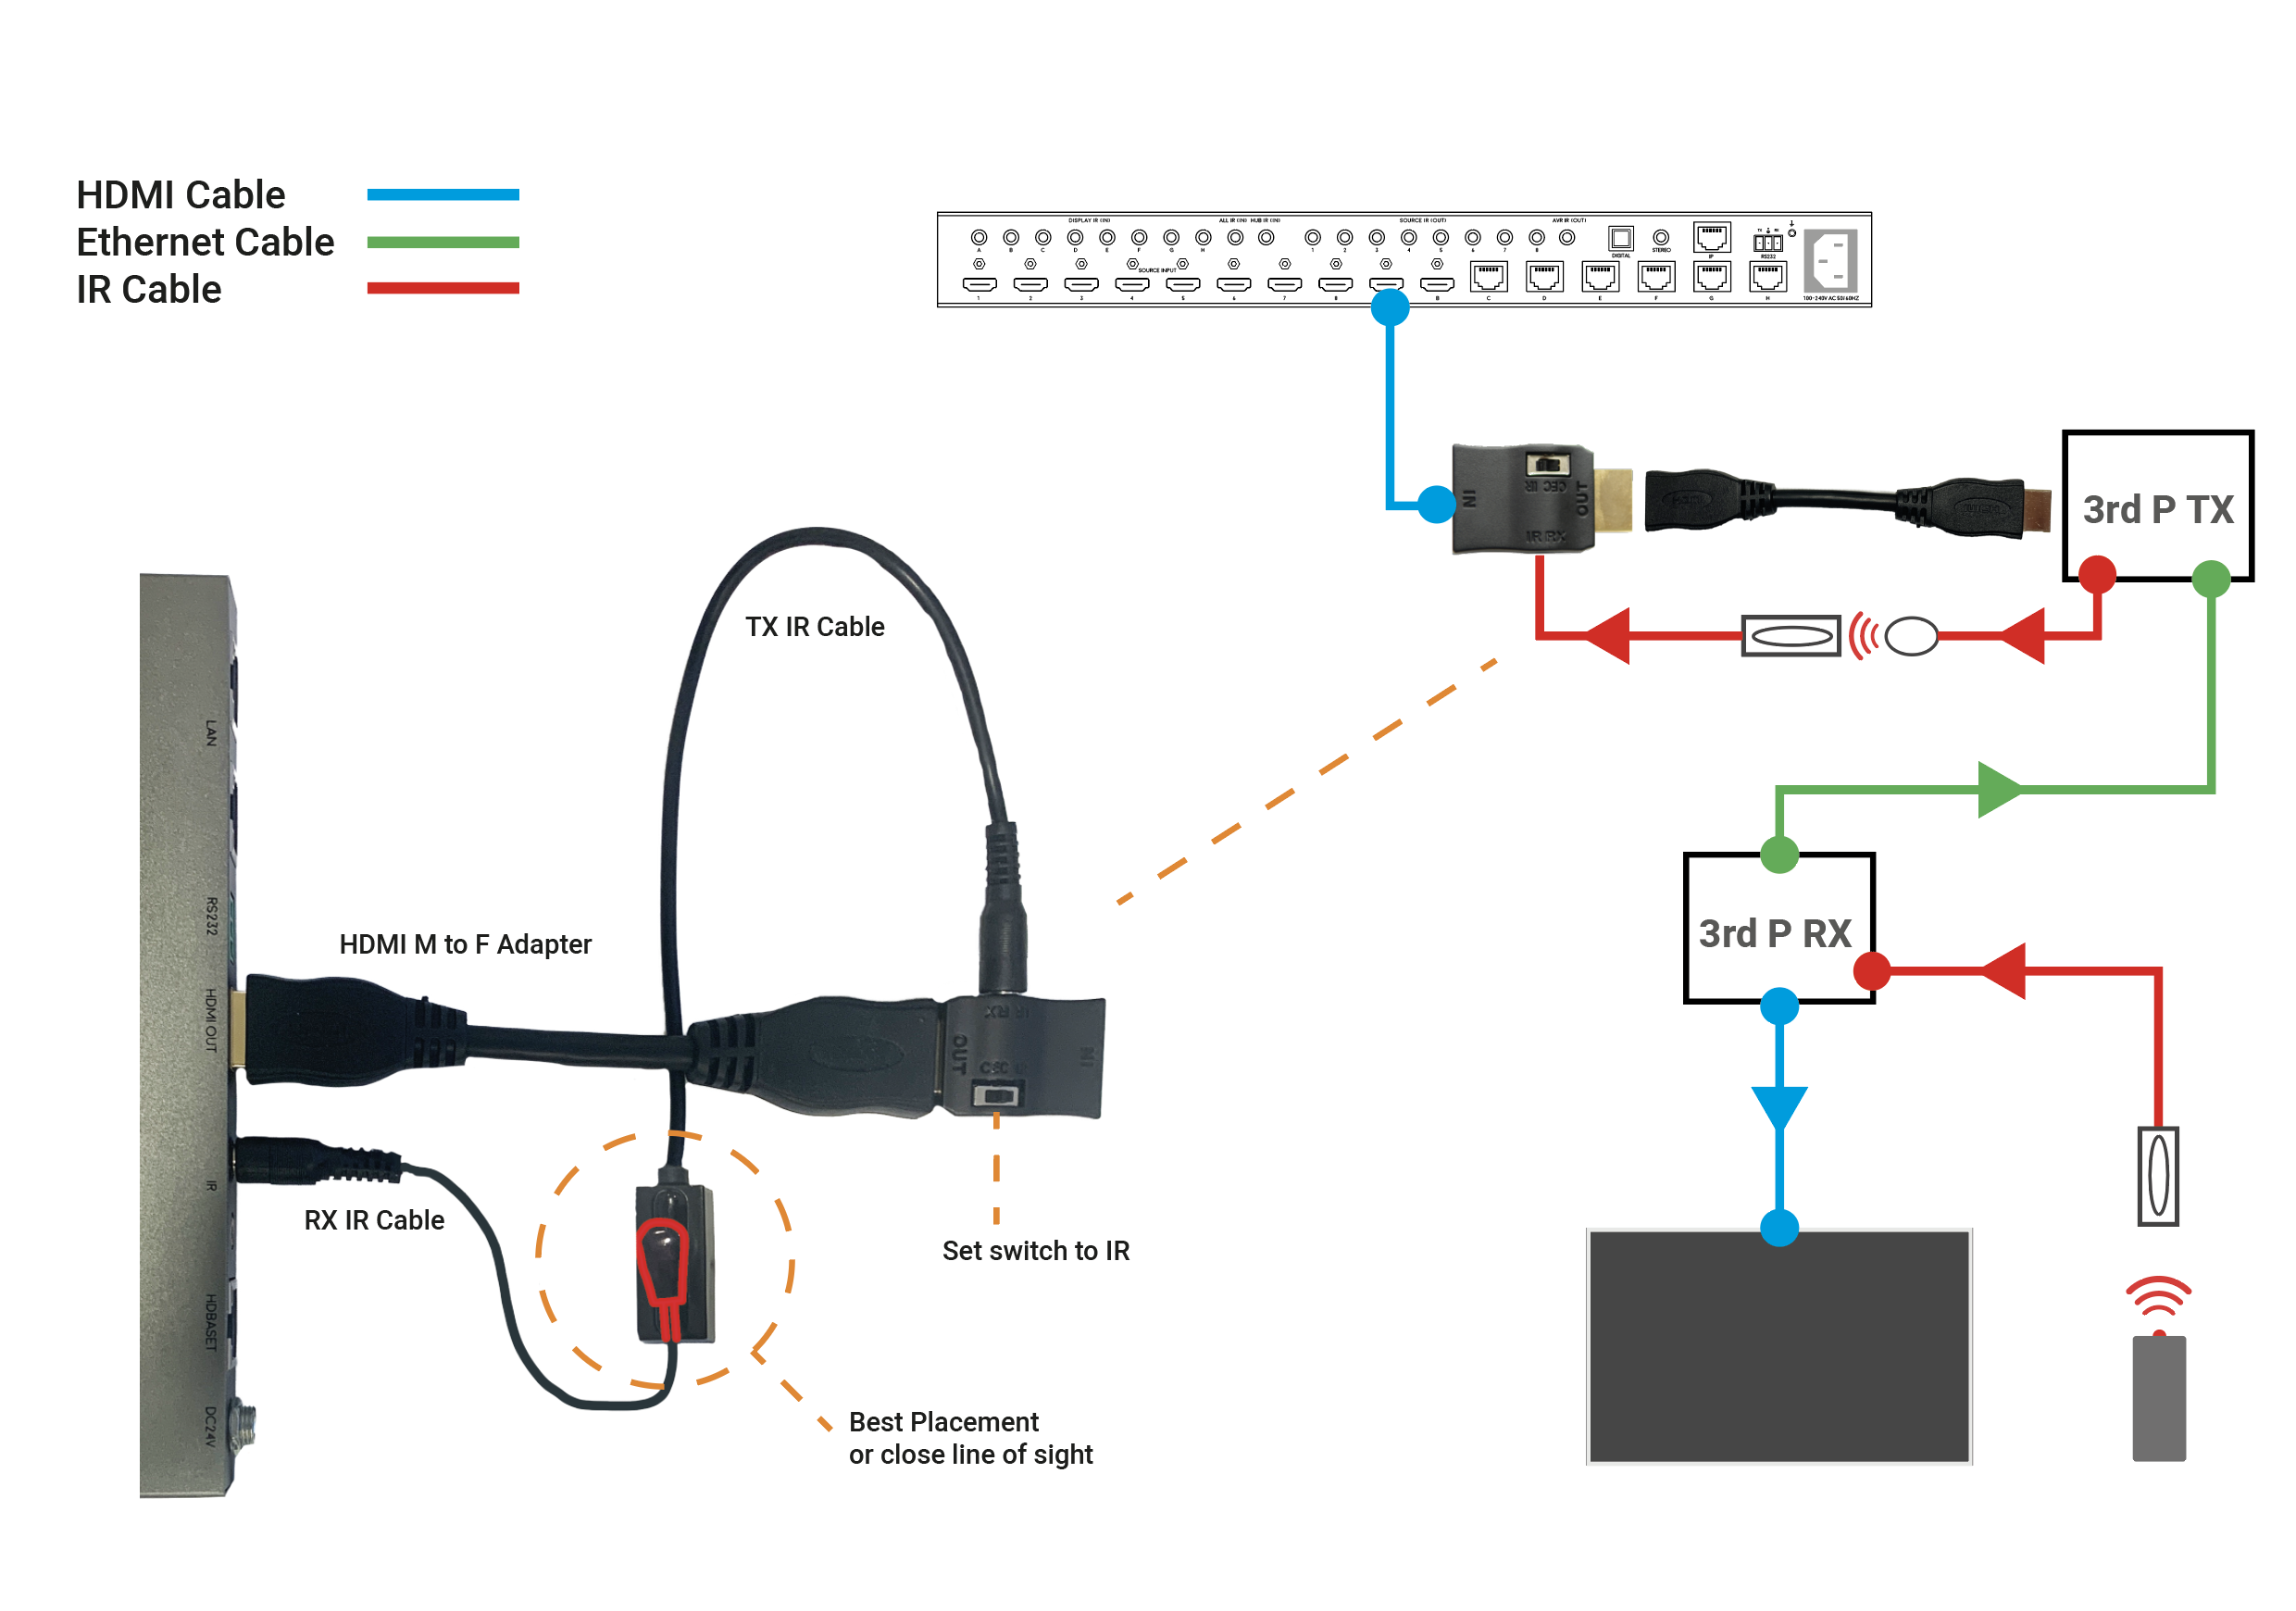
Daisy chaining IR can allow you to connect the IR systems of 2 devices. This allows IR to pass from one device to another
This does not work for HDMI Mirrored ports.
a) The diagram below shows how you can link two HDA devices, such as an MHUBU86240 and an XTND4K40TPC using a MHUB + XTND Integration Kit
b) This second diagram shows how you would connect a HDA system to a 3RD PARTY extender or device such as a Harmony Remote by Daisy-chaining the IR transmitter from the 3RD party device and the IR receiver included with the MHUB system.
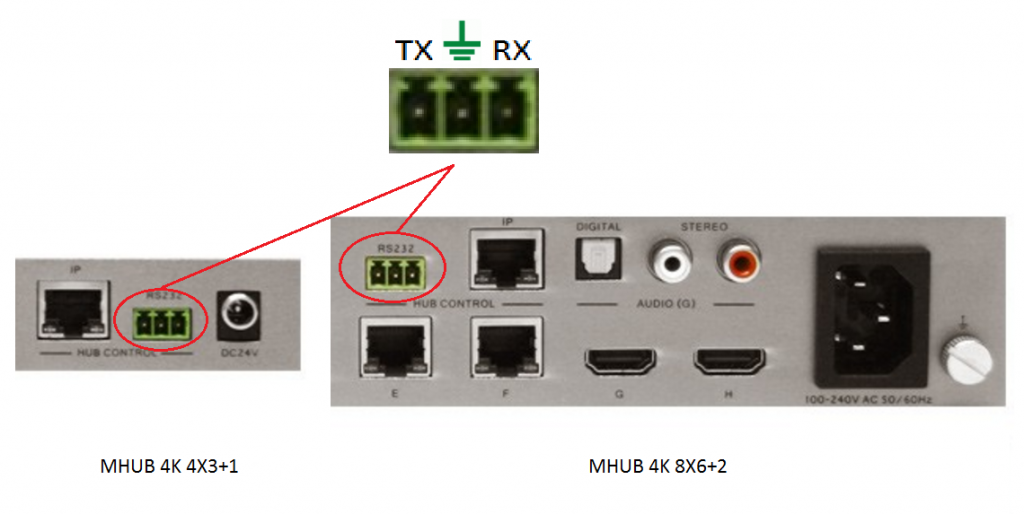
The mHub 4K range has full support for most popular control systems via serial (RS232) or IP.
All control strings and current available drivers are available in the mHub control pack, available here – Download
IP control
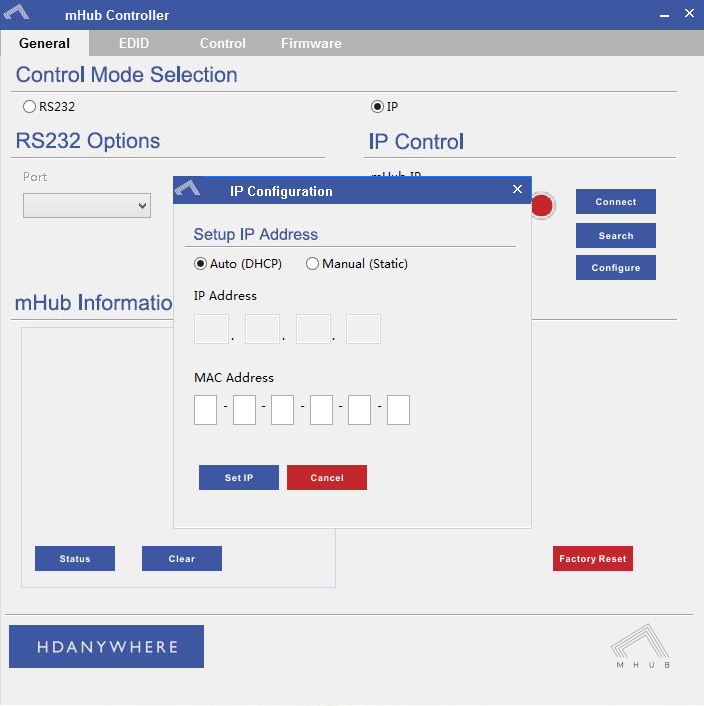
To control the mHub 4k unit via IP you will first need to discover it by using the mHub controller software available in the control pack above
The mHub 4K will acquire an IP address via DHCP the first time it is connected to your home network, use the controller software to locate it on your network.
In the mHub controller software select IP and then press the ‘search’ button, this should locate your mHub matrix. Press ‘connect’ the red button should turn green.
Press the configure button
From here you can set the matrix to a static IP if you wish (this is generally good practice)
Your matrix is now on your home network and will be able to receive IP commands from whatever control system you are using.
Looking for the mHub 2K information, go here – mHub 2K
The mHub 2K range has full support for most popular control systems via serial (RS232) or IP.
All control strings and current available drivers are available in the mHub control pack, available here – mHub Control Pack
To control the mHub 2k unit via IP you will first need to discover it by using the mHub controller software available in the control pack.
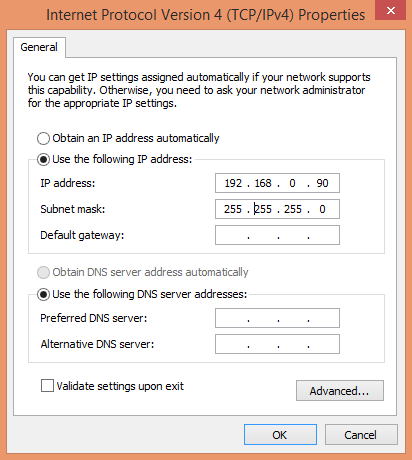
The mhub 2K’s IP address is pre-configured as 192.168.0.100, your computer will need to have it’s IPV4 range configured to be within the same range initially while you setup the matrix. To configure your IPV4 settings you will need to navigate to the following menu
->Network and sharing center
—>Ethernet
—–>Properties
——->Internet Protocol Version 4 (TCP/IPv4)
———>Properties
Configure your settings as shown in the image, this will change your computer IP range and you will temporarily lose internet connectivity (if your previous IP range was different from this)
Once you have changed the IP settings on your PC, open the Mhub controller software
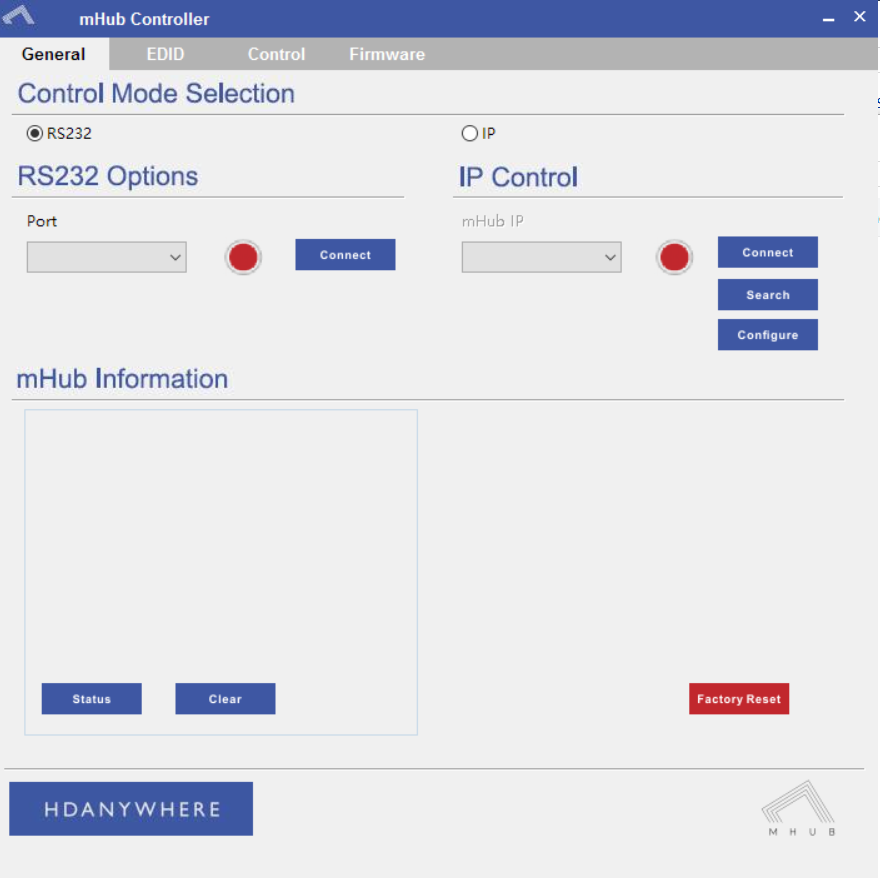
In the mHub controller software select IP and then press the ‘search’ button, this should locate your mHub matrix. Press ‘connect’ the red button should turn green.
Press the configure button
Change the IP configuration to manual (static), and then enter an IP address within your home network range that is not currently being used and then click ‘Set IP’.
You can now go back into your IPV4 settings and set them back as they were before (obtain an IP address automatically)
Your matrix is now on your home network and will be able to receive IP commands from whatever control system you are using.
Looking for the mHub 4K information, go here – mHub 4K
HDBaseT Product Distance Capability Notes
Products based on HDBaseT are based on one of two groups of electronic chips. The HDBaseT-Pro and HDBaseT-Lite groups. Each has different distances over which it can extend HDMI and this also depends on the type of cable used.
Our HDTV multiroom products use the physical properties of the twisted pair copper cables to transmit an uncompressed HDMI signal. It does not alter or compress the HDMI transmission into IP for example.
It cannot be linked in to an existing IP network. Our latest HDBaseT models however can transmit both HDMI and Internet traffic over a single Cat5/6 cable.
