uOS 11 – A Guide to Every Page
IMPORTANT: For the best setup experience, we recommend using a tablet or laptop instead of a smartphone. Using a larger screen makes it easier to navigate the setup process and view all the options clearly.
Pages
THIS GUIDE IS FOR uOS 11 AND ABOVE:
This guide is for HDA devices that are operating uOS 11 or above and have completed the First Boot Process. This guide does not apply to ANY hardware running MHUB-OS or uOS devices that are running on version 11 or lower. How to update your system.
Accessing the menu
The uOS interface features a hidden dropdown menu that provides access to all system settings. To reveal the menu, simply click on the uControl logo located in the top left corner of the screen.

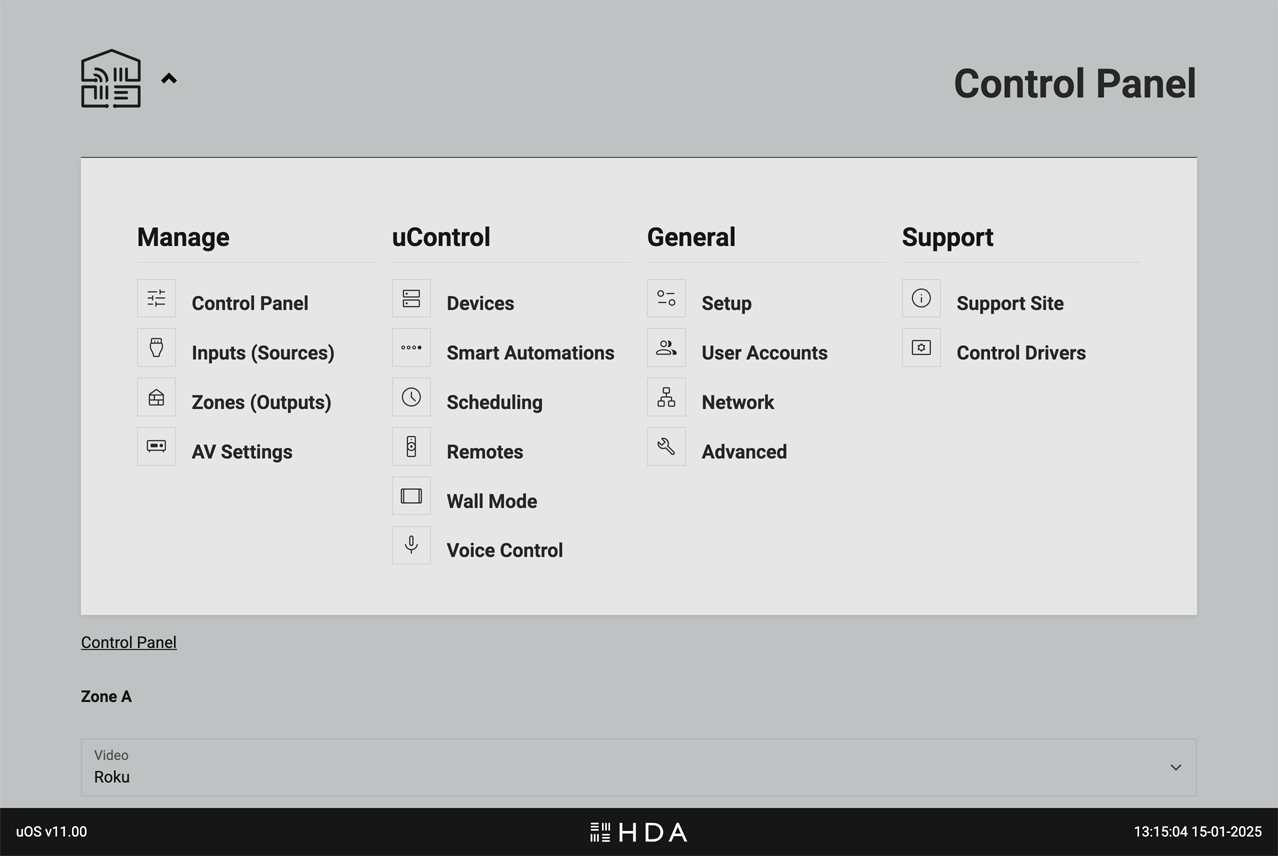
Control Panel
Web Interface for direct control of system state.

Gives users direct access to the system state via a web interface, bypassing any other control methods. Control is grouped by Zone and will differ depending on what outputs from your HDA device were assigned to them. For example, if you add a video output and an audio output in a Zone named “Living Room” then uOS will display both video switching, audio switching and (hardware dependent) volume controls in the “Living Room” section of the Control Panel
What can you control?
- Source Selection: Choose which video or audio source is routed to the Zone in question.
- Volume: If your HDA device supports volume control then a slider and mute controls will appear.
- System Power: At the bottom of the page is power control for the entire system. It is recommended to use this control only if you wish to turn the entire system off.
What to do if you can not see any controls on this page or controls do not appear to be working correctly.
Ensure that you have created your Zone and assigned either a video or audio output from your HDA device to it. If you are still experiencing a problem, contact HDA Support.
When to use the Control Panel
The web interface is a valuable troubleshooting and backup tool if you have lost control from your normal control method. If you’re experiencing issues with your HDA system, try controlling it directly through this page.
Inputs (Sources)
Management of connected AV input devices.

This page allows you to manage all the AV source devices connected to your HDA system.
- Custom Naming: Give your devices meaningful names (e.g., “Blu-ray Player” instead of “Input 1″) for easy identification throughout the system.
- Global Visibility: Control which input sources are available system-wide. For example, if you have an 8-input system but only use 5 sources, you can disable the unused inputs (6, 7, and 8) so they appear nowhere in uOS. Important: Hiding an input here makes it unavailable across your entire system, unlike Zone-level visibility settings which only control source visibility of active inputs. This is manaaged from the “Zones” page.
- Manage Connections: Tell uOS how multiple HDA devices are connected to one another if you are operating a Stacked System
Zones
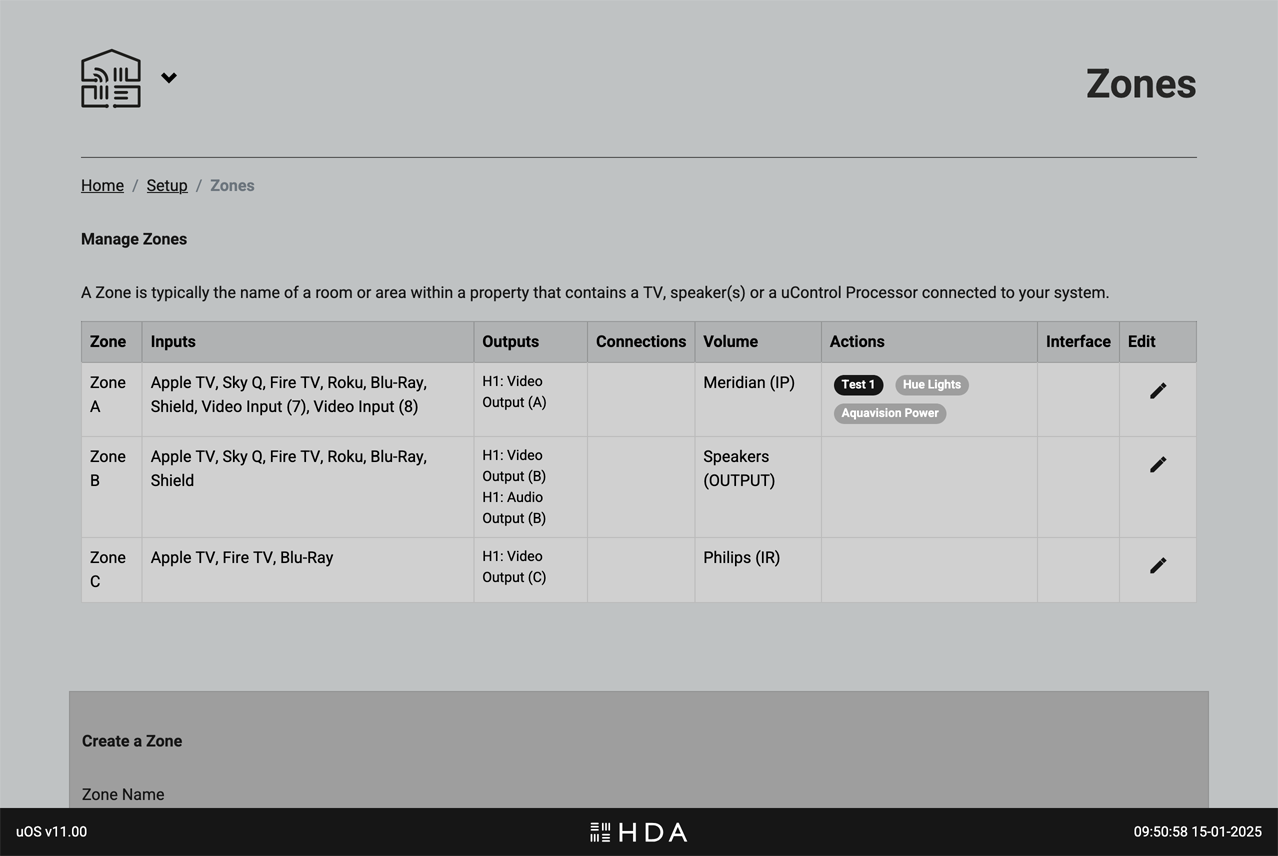
Manage the Zones in your system.
.
This page is for configuring and customising the Zones within your HDA system. This page provides a clear overview of your entire system from one place.
Key functions on this page
- Zone Naming: Personalise your Zones with names that make sense to you (e.g., “Living Room” instead of “Zone 2″).
- Source Visibility: Control which AV input sources are available in each Zone. For example, you might want to make the “Blu-ray Player” source available in the “Living Room” but not in the “Kitchen.”
- Zone Configuration: Add or remove Zones from your system or change what outputs from your HDA device are assigned to them.
If you are using uControl to control your system, then these Advanced features are also recommended.
- Zone (On/Off) Automation: Select what Sequence is assigned to the Zone ON and Zone Off (e.g. TV off, lights off) event.
- Default Volume Control:Choose which device from your uControl library has primary control over the Zone’s volume.
Recommendation:Add or remove Zones from your system or change what outputs from your HDA device are assigned to them.
AV Settings
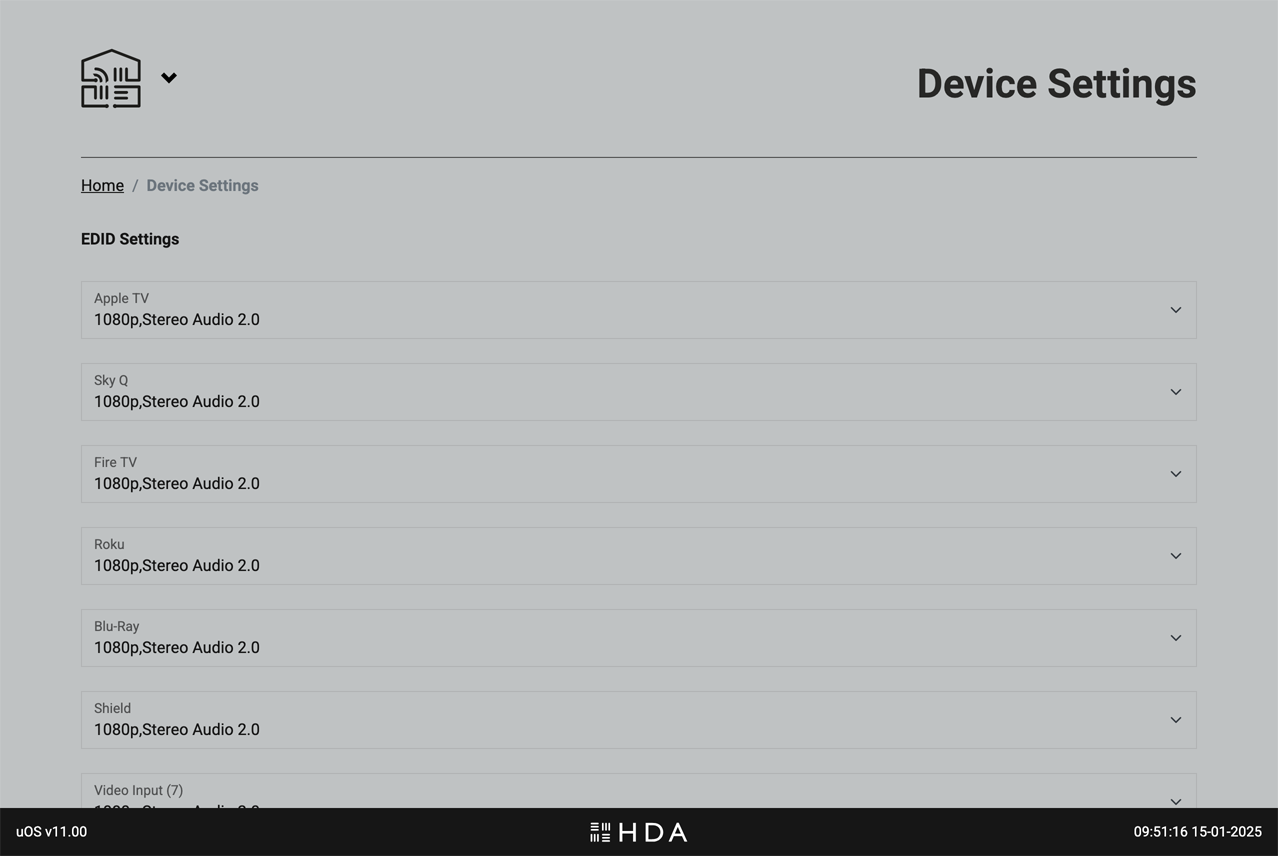
Fine-tune your audio and video settings.
.
This page allows you to customise advanced audio and video settings for your HDA system to achieve optimal performance. This page displays settings specific to your HDA device hardware. If you have a stacked system with multiple HDA devices, you’ll find settings for each device grouped by hardware name and type. This allows for granular control over each device in your system.
Key functions on this page
- EDID Management: Control how your HDA device communicates with displays to ensure compatibility and optimal resolution.
- Video Scaling: Adjust how video content is scaled and displayed on your screens.
- Audio Volume Presets:Configure input gain and max volume levels for sources and Zones.
- EQ Settings:Fine-tune audio equalisation for specific Zones or outputs.
Devices
Add new devices to uControl or manage how they work.

.
Control your devices and their features seamlessly through the uControl app, a uControl Remote, or Smart Automations. To get started, click or tap on the button labelled “ADD NEW DEVICE” and simply find and install the appropriate uControl pack, driver or establish a uControl IP connection for any Smart Devices (eg, lights, blinds, PDUs etc).
Once installed, all devices that uControl can control will appear here along with any important data such as the current IP address, what input or output the pack is assigned to and the ID.
It is also possible to test CEC commands from the pre-installed uControl CEC pack. This is available at the bottom of the page if your HDA devices supports HDMI-CEC control.
Add device control to uOS
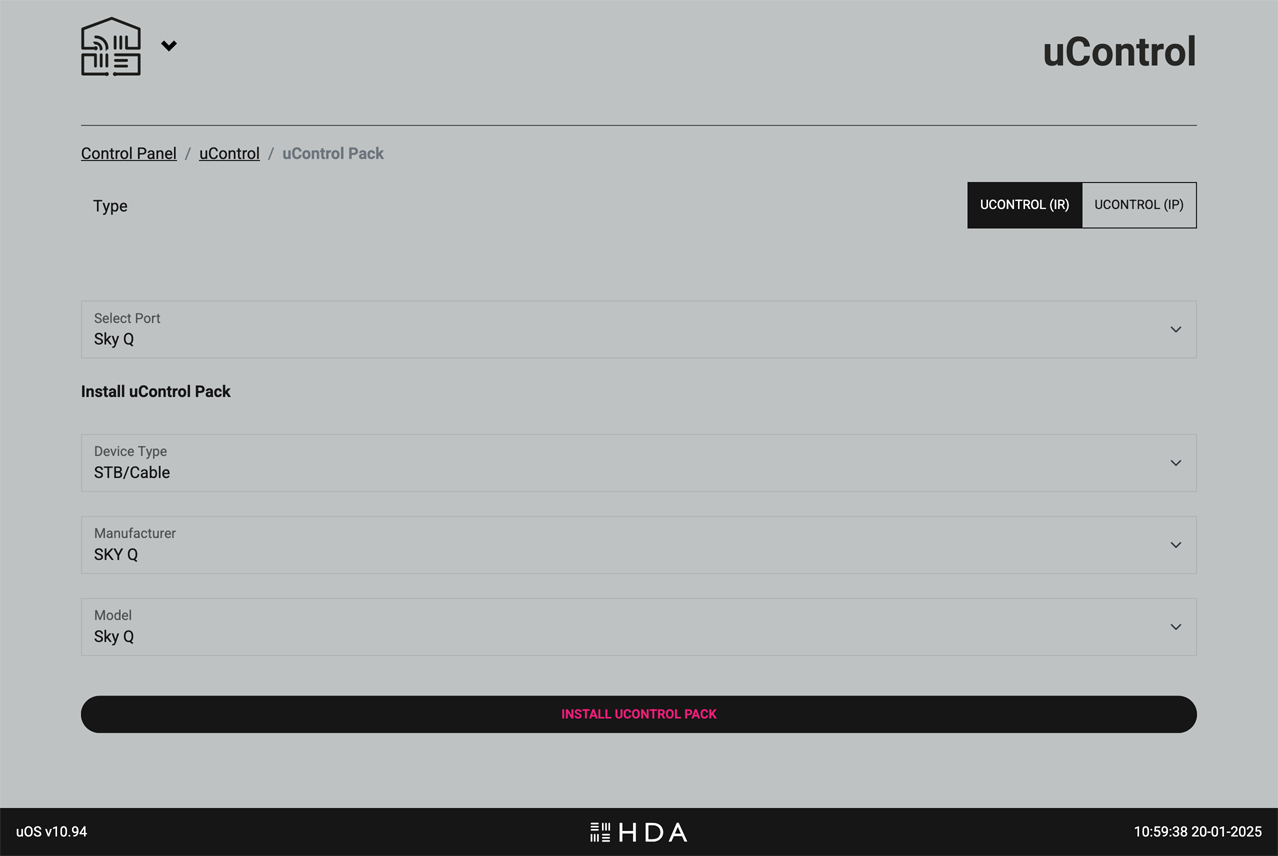
AV Device: select between installing a uControl pack (IR, IP or a Driver) for AV devices like TVs, Blu-ray players, AV receivers, and set-top boxes.

.
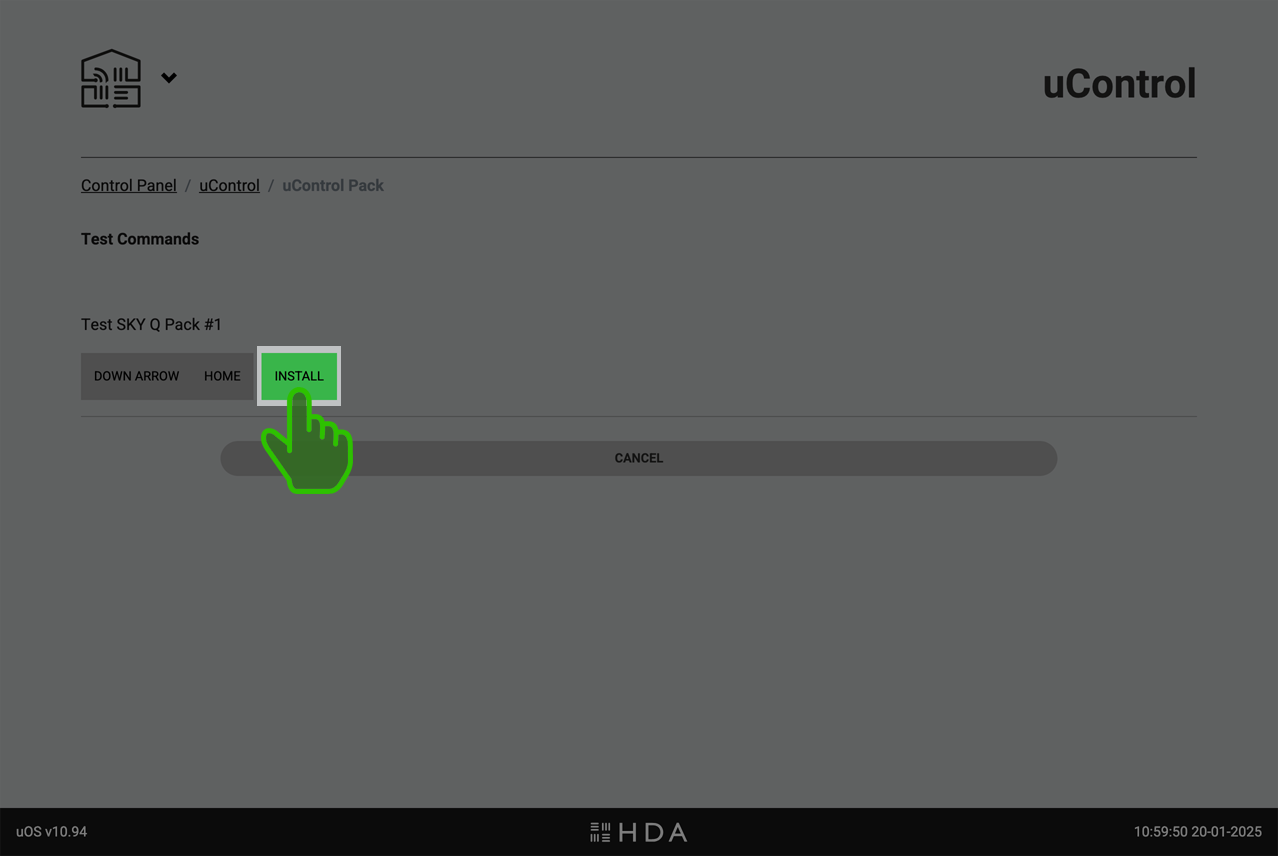
Choose between a uControl (IR or IP) pack for the device and select which input or output it is connected to. The AV device might not be connected to an input or output, and can be assigned to a Zone instead.
.
.
A detailed step-by-step guide can be found here: How to install a uControl pack.
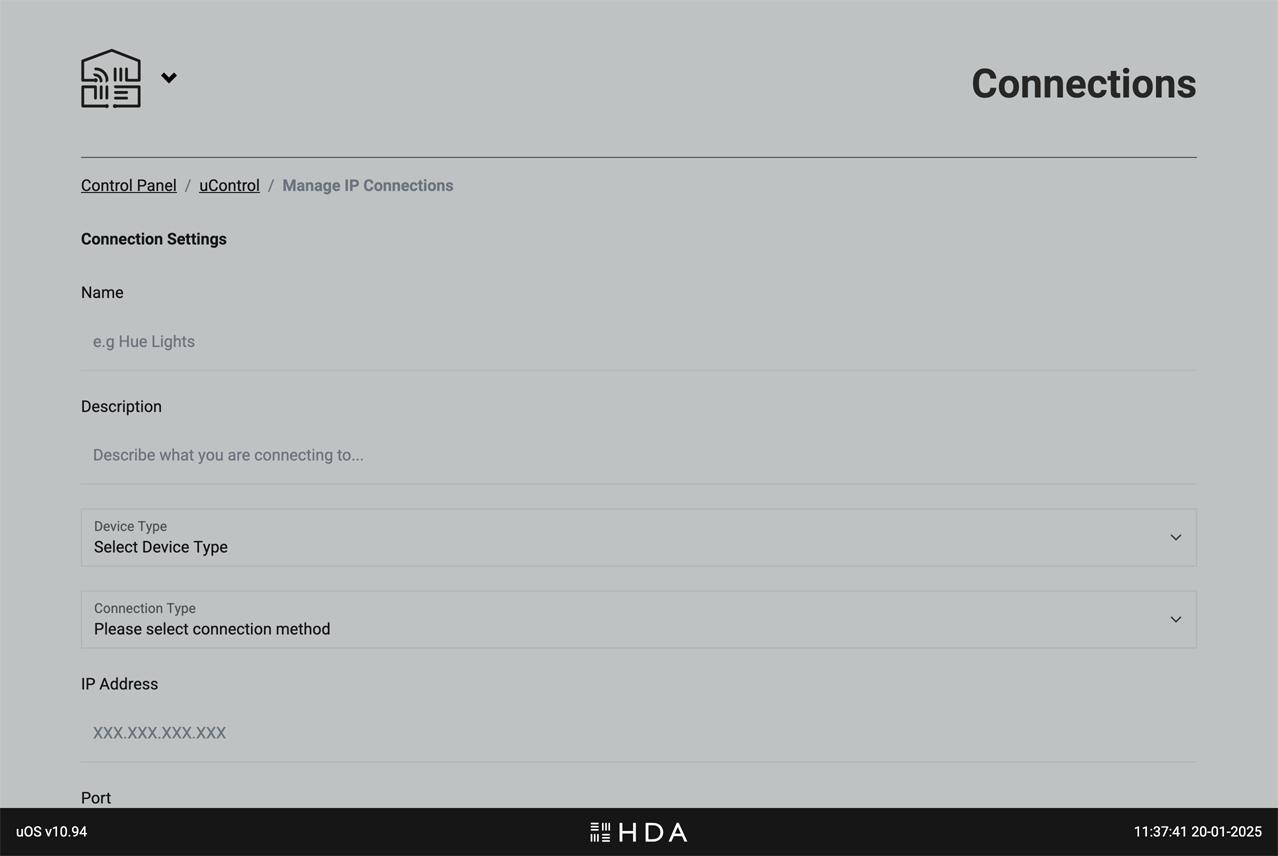
Smart Device: Create a manual IP connection to smart home devices such as smart lighting, blinds/shades, and power sockets/plugs within your Zones.
A detailed step-by-step guide can be found here: Cheatsheets for common Smart Devices.
Smart Automations
Powerful automations to enhance your uControl experience.
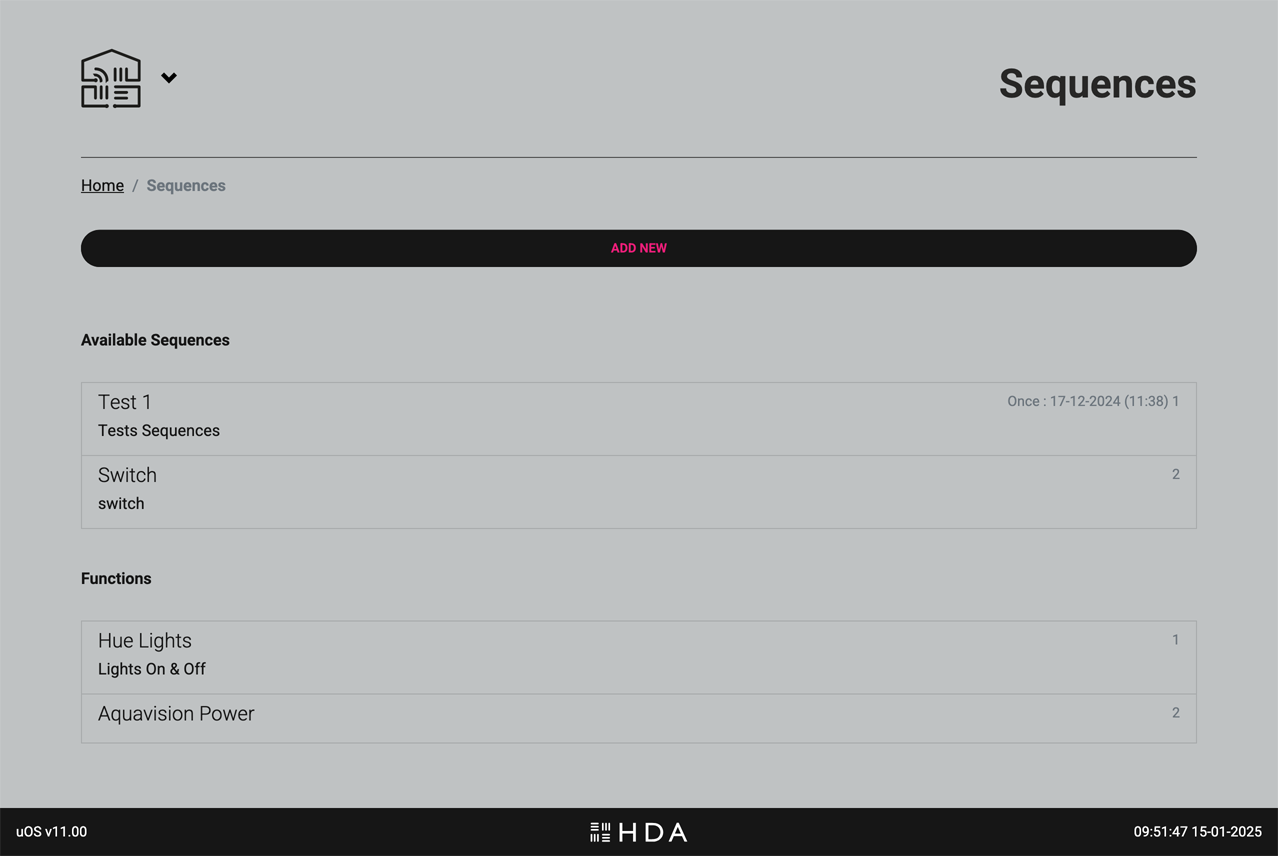
Create powerful automations, called Sequences (a series of commands executed one after another), and add intelligence to them using Functions with “if this, then that” rules to enhance and automate your uControl experience.
You can create Sequences that can turn your HDA device on or off, switch and route inputs or control the volume state in any zone. If you wish to enhance these further with AV device or Smart Device control then ensure you have installed uControl packs for them or have established IP connections before creating your Smart Automations.
Key functions on this page
- Sequences: A sequence is a series of commands executed one after another. For example, a “Movie Night” sequence might dim the lights, lower the blinds, turn on the TV, and start your Blu-ray player.
- Functions: Functions add intelligence to your automations. They can be custom commands or (“if this, then that”) logical rules. For example, a function could automatically adjust the thermostat when the temperature outside changes or turn on the lights when motion is detected.
Scheduling
Automate your Smart Automations with Scheduling

After your Smart Automations have been created you can choose to schedule them to suit your project requirements. For example, you may want all displays in an office environment to turn off at 7pm and for this to happen every Monday to Friday.
Remotes
Configure and customise your uControl Remotes.
ADD YOUR REMOTES LAST:
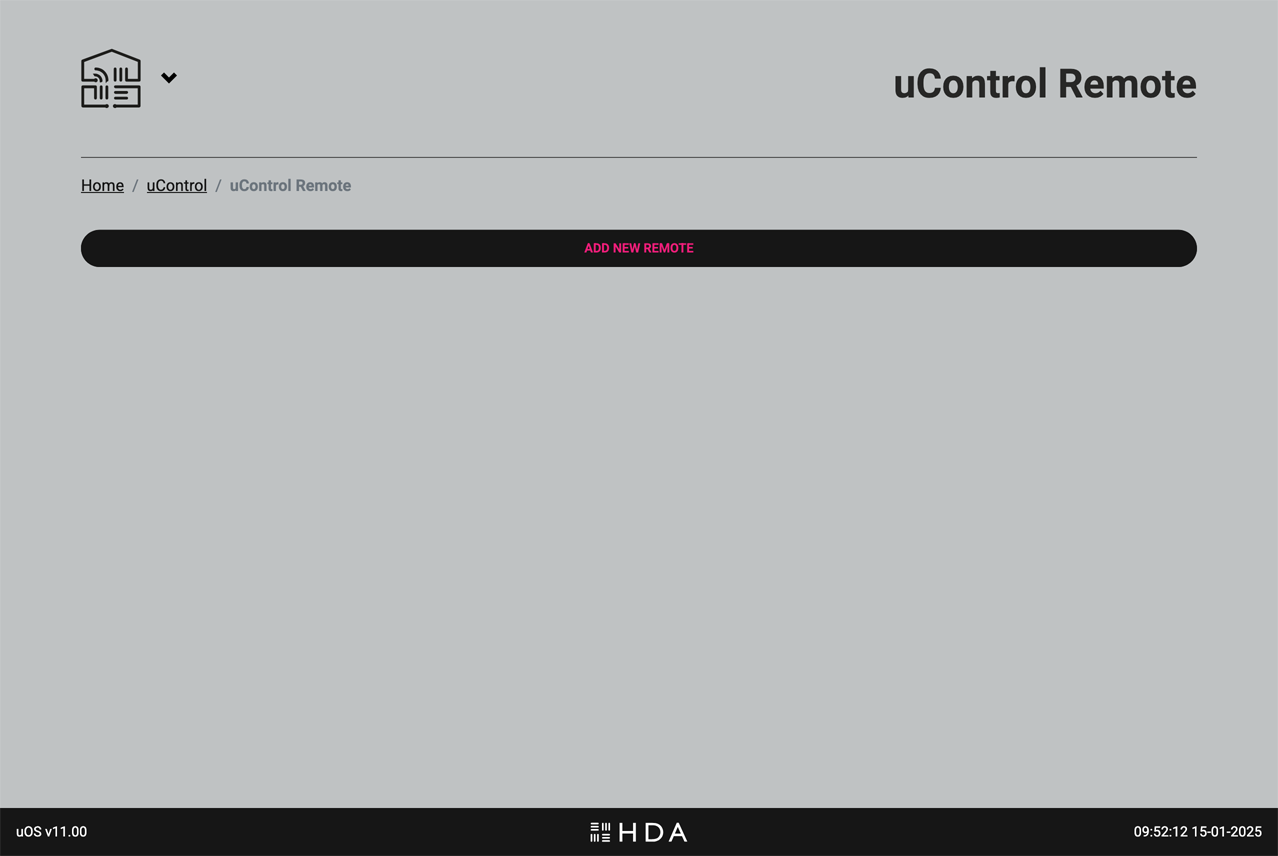
Once you’ve configured your system Zones, installed all packs, set up Smart Automations, and tested everything in the uControl app — it’s time to add your uControl Remote.
Why wait?
This approach streamlines the Remote setup process. By configuring your system first, the settings are automatically copied to the uControl Remote, making the Remote configuration faster and easier. This ensures that your Remote is ready to use with minimal additional setup.
.
Getting the Remote on WiFi & configuring it for use.
A detailed guide on how to configure the uControl Remote can be found here.
Wall Mode
A simple interface for walls and desktop applications.
.
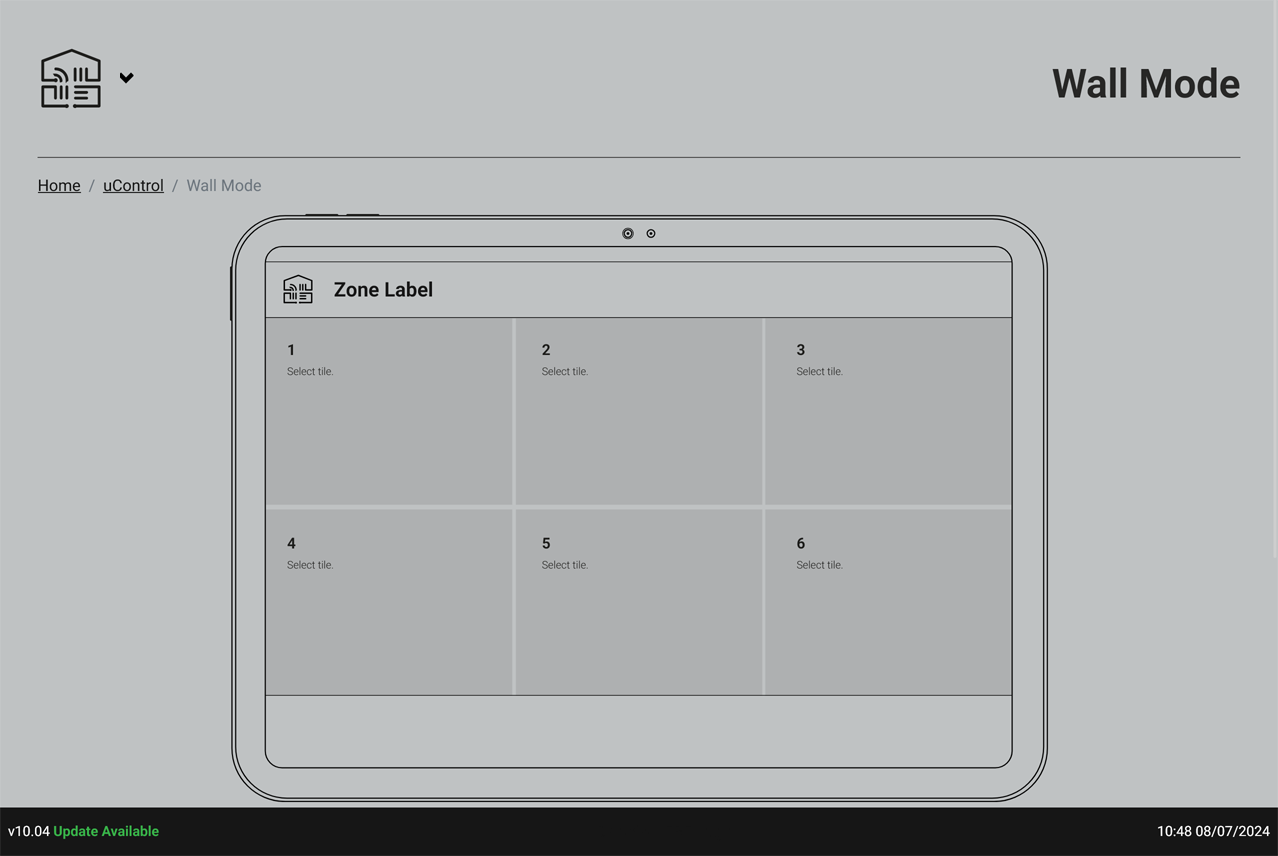
Design a simplified interface for the uControl app called “Wall Mode.” This mode will display only 6 large tiles on the iPad screen when held in landscape orientation.
Wall Mode is ideal for iPads mounted on walls or placed on tabletops. It makes using the app easier for newcommers or those that do not know how to use the system by hiding all the other menus and options, and presenting the user with just 6 essential controls for a single zone.
IMPORTANT:You can not configure Wall Mode until you have setup Smart Automations. It is recommended that Wall Mode is configured after any uControl Remotes.
To configure a tile, simply click or tap on the tile that you want to configure and add your Smart Automation to it. If uControl driver packs support wall mode configurations then you will have the option to add a driver widget to your tile (e.g Sonos) so that you can see realtime data on that particular tile.
Voice Control
Amazon Alexa voice control

This section allows you to enable or disable Amazon Alexa voice control for your HDA system.
Compatibility
Please note that voice control functionality depends on your specific HDA hardware and system configuration. If your system supports Alexa integration, you’ll find the following options:
A detailed step-by-step guide can be found here: How to configure voice control and account linking to your Amazon Account for the “AV Skill”.
Setup
General uOS setup

What you will find on this page
- Names and software versions: The official name for your HDA device(s) along with current software and firmware versions.
- Timezone: Set the timezone for uOS. By default, uOS will sync its time to GMT clocks. If you intend on using Scheduling to automate your Smart Automations then it is recommended that you set this to your timezone. This is a manual setting.
- Access control: Set a PIN code to lock access to uOS. It is STRONGLY RECOMMEDED that you keep a record of this PIN somewhere safe or connect your system to HDA Cloud so HDA Support can recover this for you. Once the PIN is set and in the event that it is forgotten or lost, only a system reset will recover your system.
User Accounts
Warranty extension and improved customer service

User Accounts connect your HDA device to HDA Cloud, our global data storage and service delivery platform. There are multiple benefits of connecting your HDA device to our cloud servers but the most common reason is the free warranty extension if this is done within 30 days of purchase.
There are two types of account: 1) Owner/User Accounts which belongs to the owner of the HDA device(s) being registered and 2) HDA Pro Accounts which can be used for monitoring the system remotely.
At all times the Owner Account has executive control of uOS, their HDA Cloud account and their HDA device hardware. It is possible to terminate HDA Pro access directly from this page. The absense of an Owner Account will keep the unit technically offline (with the exception of critical updates) and no information about the system or its state will be sent to HDA servers.
Network
Ethernet and WiFi settings for your HDA device(s)

Adjust uOS’ network settings to suit your Local Area Network configuration. IMPORTANT: proceed with care when changing these settings as you can lose connection to your controller if you make a mistake.
Advanced
Power-user access

Advanced settings for management and maintenance of uOS. Warning: This is an advanced area of uOS and changes here can affect system stability or potentially invalidate warranty status. Please use these tools carefully.
Before making any changes on this page, ensure you have a thorough understanding of the potential impact. If you are unsure about any settings, please contact HDA support for assistance.
 Accessing the menu