Enabling DHCP on MHUB if you have lost it on your network
If your MHUB has been configured with a fixed IP address and you changed your network infrastructure then your MHUB may become unreachable by your new router.
With MHUB PRO models you can enable DHCP from the MENU button on the front panel by holding it down for 3 seconds. For MHUB 100A & MHUB U (4×1+1) 40 models you need to follow Guide 1, for MHUB U (4×3+1) 40 & (8×6+2) 40 models follow Guide 2 and for older MHUB U (micro USB on front) models use Guide 3.
- Guide 1 – MHUB 100A models & MHUB U (4×1+1) 40
- Guide 2 – MHUB U (4×3+1) 40 & (8×6+2) 40
- Guide 3 – Older MHUB models (micro USB on front)
MHUB 100A & MHUB U (4×1+1) 40
To reset DHCP on an MHUB (4×4, 6×6, 8+8×8) 100A you can either use the Hercules method which is included below, or you can hold down Output A on the front panel of the matrix for 10 seconds.
To reset an MHUB S (16+16×16) 100A press and hold button 1 for 10 seconds.
To reset to DHCP on an MHUB U (4×1+1) 40 you can press and hold the 2 front panel buttons for 10 seconds.
Items needed
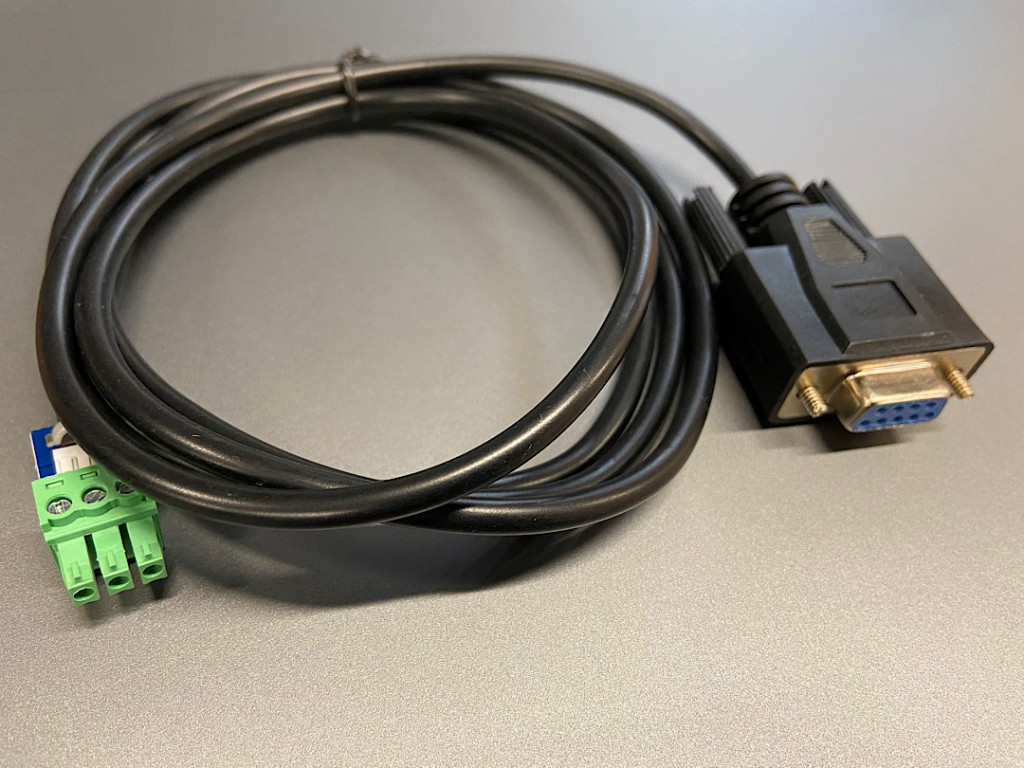
- Serial to USB A cable.
- USB to Serial adaptor or a PC with a 9-pin serial COM port (see below for image)
- Hercules Software – Hercules SETUP utility – Produced by www.HW-group.com.
Steps
- Install Hercules and open the software on your PC or laptop
- Connect the serial to phoenix cable to the MHUB, and then your serial to USB adaptor into a laptop or PC.
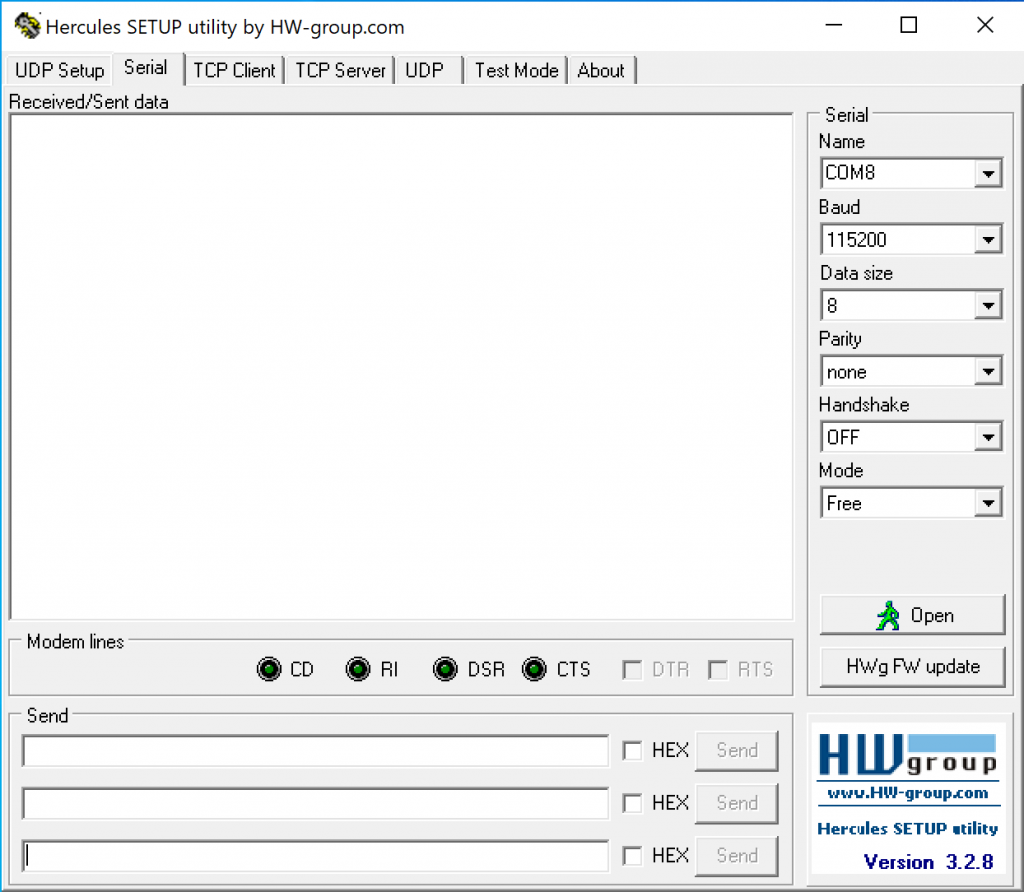
- Go back to Hercules, ensure that the Baud is 115200, the Data Size is 8, the parity is None, the Handshake is OFF and finally, the Mode is Free.
- Click on the “Open” button. Your PC will now connect directly to the MHUB.
- Type DHCPON! in the box labelled “Send” and click “Send”. Make sure that “Hex” remains unticked.
- You will receive a response in the “Received/Sent Data” box. This will confirm that the MHUB has been reset to DHCP.
- Hard reboot your MHUB by pulling the power out from the back of the system.
- Reconnect MHUB to your router as normal and power up the system. Your MHUB should now be discoverable.
MHUB U
Items needed
- Serial to phoenix Cable (included in your MHUB packaging)
- USB to Serial adaptor or a PC with a 9-pin serial COM port (see below for image)
- Hercules Software – Hercules SETUP utility – Produced by www.HW-group.com.
Steps
- Install Hercules and open the software on your PC or laptop
- Connect the serial to phoenix cable to the MHUB, and then your serial to USB adaptor into a laptop or PC.
- Go back to Hercules, ensure that the Baud is 115200, the Data Size is 8, the parity is None, the Handshake is OFF and finally, the Mode is Free.
- Click on the “Open” button. Your PC will now connect directly to the MHUB.
- Type DHCPON! in the box labelled “Send” and click “Send”. Make sure that “Hex” remains unticked.
- You will receive a response in the “Received/Sent Data” box. This will confirm that the MHUB has been reset to DHCP.
- Hard reboot your MHUB by pulling the power out from the back of the system.
- Reconnect MHUB to your router as normal and power up the system. Your MHUB should now be discoverable.
Serial to phoenix Cable
MHUB 4K (with micro USB on front panel)
If your MHUB U has a micro USB port on the right hand side of the front panel then please follow these steps to reset your system. Using Hercules from the steps above, send the following command:
- Baud Rate 9600
- Data Size 8
- No parity
- Restore Command: %0911. (include the full stop “.”)
- Query IP Command: %9964.