What is EDID?
When you connect an HDMI source such as Sky Q directly to a display, the HDMI cable will send a data exchange between the two devices before they both agree to serve and display a picture. This process is called the handshake. One component of that handshake is called EDID and this is where your display tells the Sky Q what its visual and audio capabilities are (resolution, refresh rate, stereo or multi-channel audio, HDR, etc, etc). In return, Sky Q will choose a picture format that best fits that profile and output something specifically for that display only.
A source device can only output a single format, so you could not get it to output a 4K signal and a 1080p signal simultaneously. It has to be one or the other.
EDID in MHUB
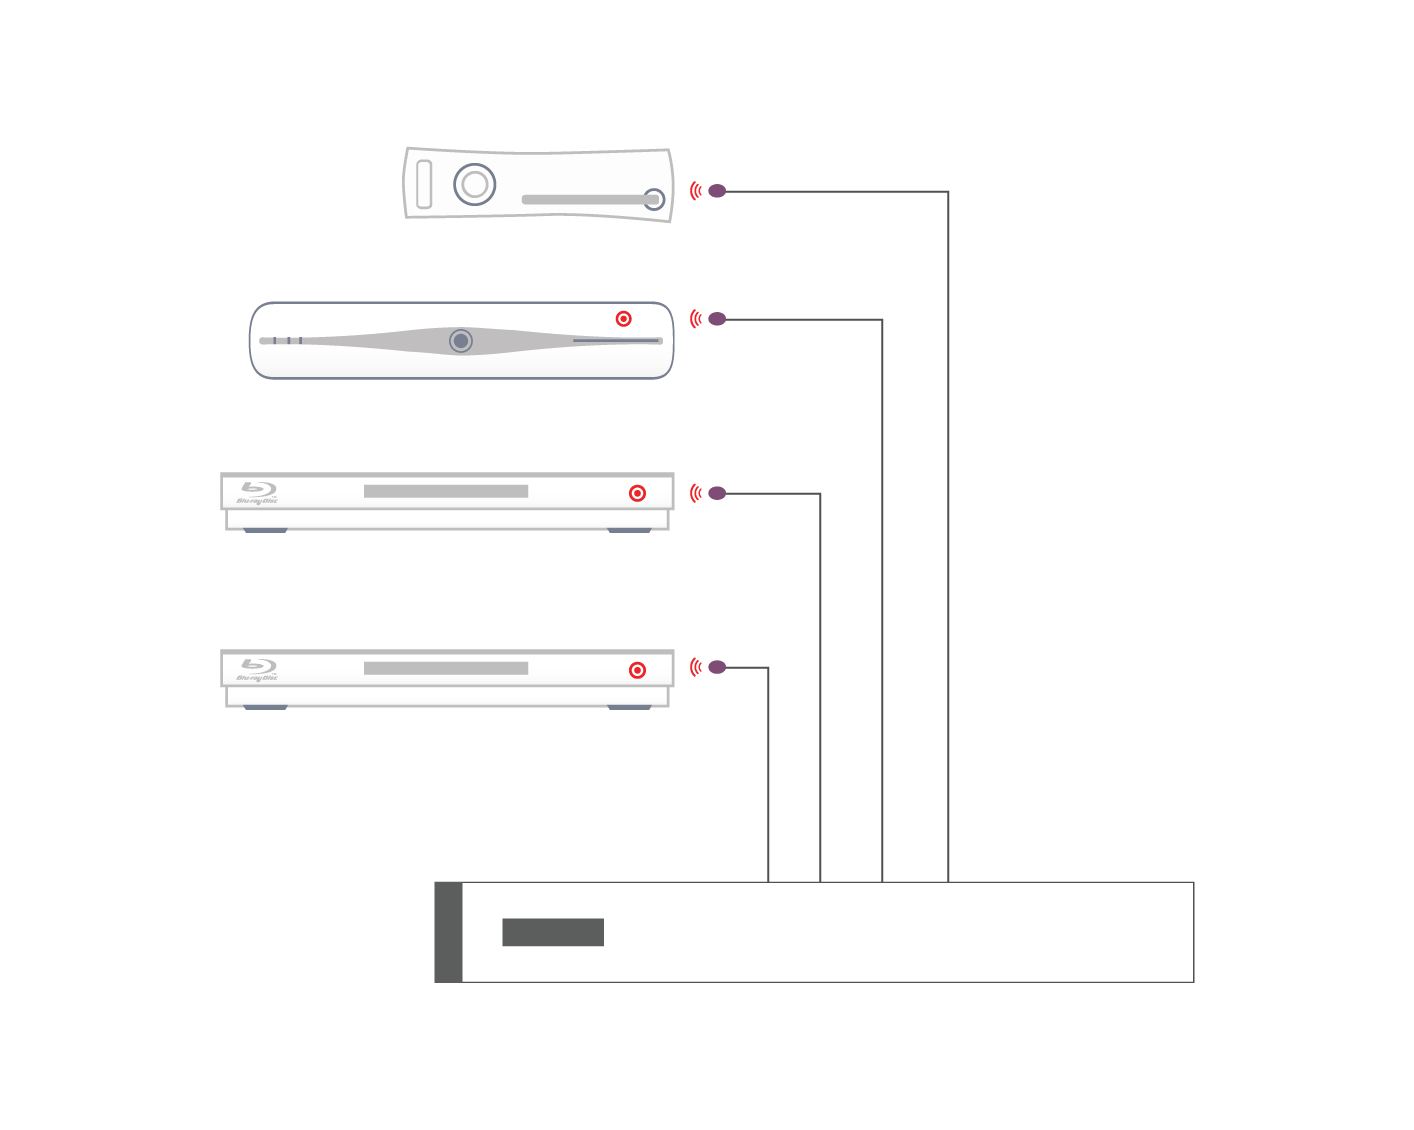
If a device sits in between the source and display (like MHUB) then it must broker that handshake. The complexity comes when you have multiple displays of varying specifications connected to your system. For example, you may have 4K, 1080p, and 1080i capable displays, each with varying audio support. These displays send EDID information back to MHUB. If no EDID profile has been configured in the MHUB system the source will output the lowest common denominator, basically the spec of the least capable display.
This is where EDID management within the MHUB comes into play. You can set a fixed profile that is passed to the source device directly from the MHUB, overriding any information coming from connected displays. Doing this allows you to fix the output of the source regardless of display(s).
The benefit of this would be if you wanted your source device to always output a fixed signal, such as 3840×2160(4k) with 5.1 audio, setting this on the MHUB will ensure that will be what the source outputs.
However, if any display is incapable of receiving the fixed video and audio output you could be left with no video output/audio on those displays unless your MHUB supports video downscaling