Soundbars
As TVs have become thinner, the space required for housing speakers within them have diminished, often leaving TV audio weak, lacking in depth and richness. Soundbars are an effective solution to that problem and HDANYWHERE works with them absolutely fine.
Picking the right soundbar.
There are generally three types of soundbar available.
- Stereo soundbars
- Multichannel 5.1 soundbars
- Multichannel (Spacial) soundbars that support Dolby Atmos and DTS-HD
1. Stereo soundbars
If you have #1 (stereo soundbars) then you’re good to go. This will work all over your property as the speaker arrangement and capability is just a better version of what your TV already supports.
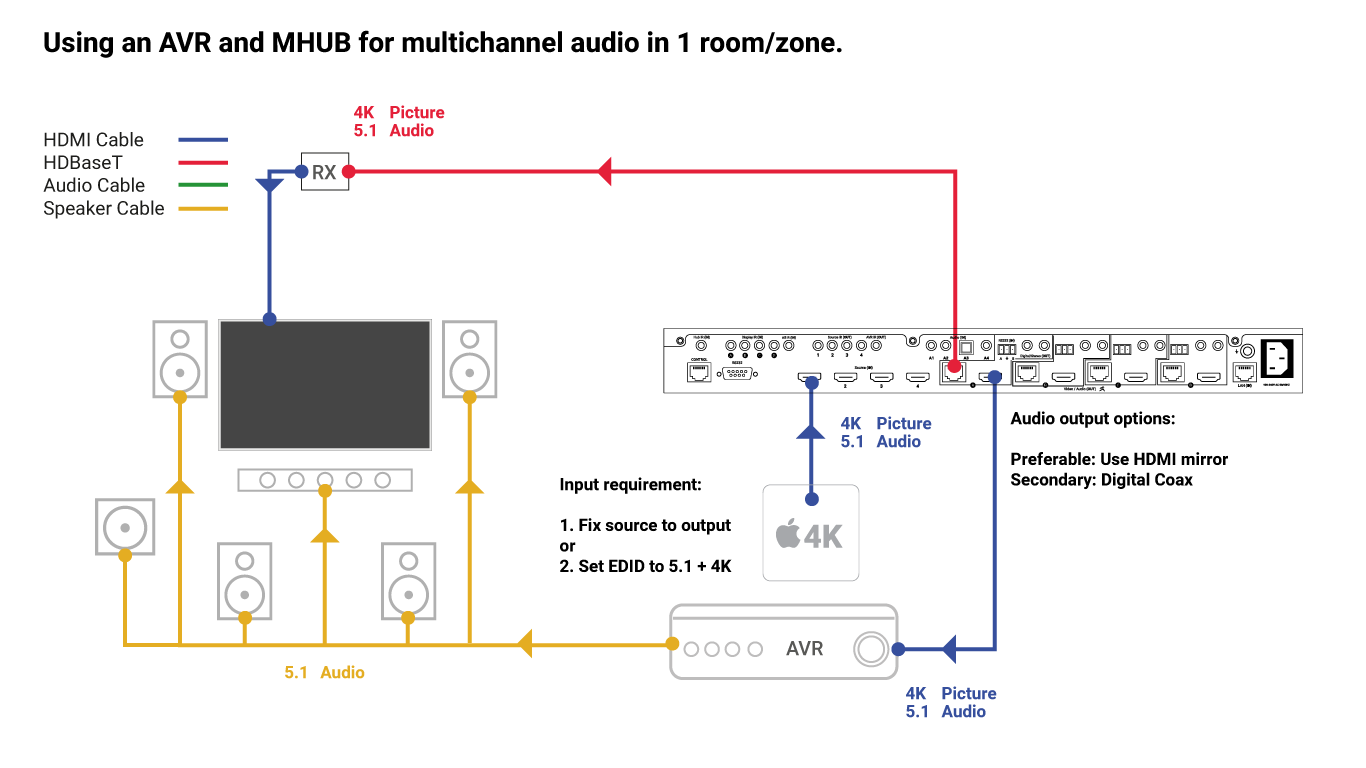
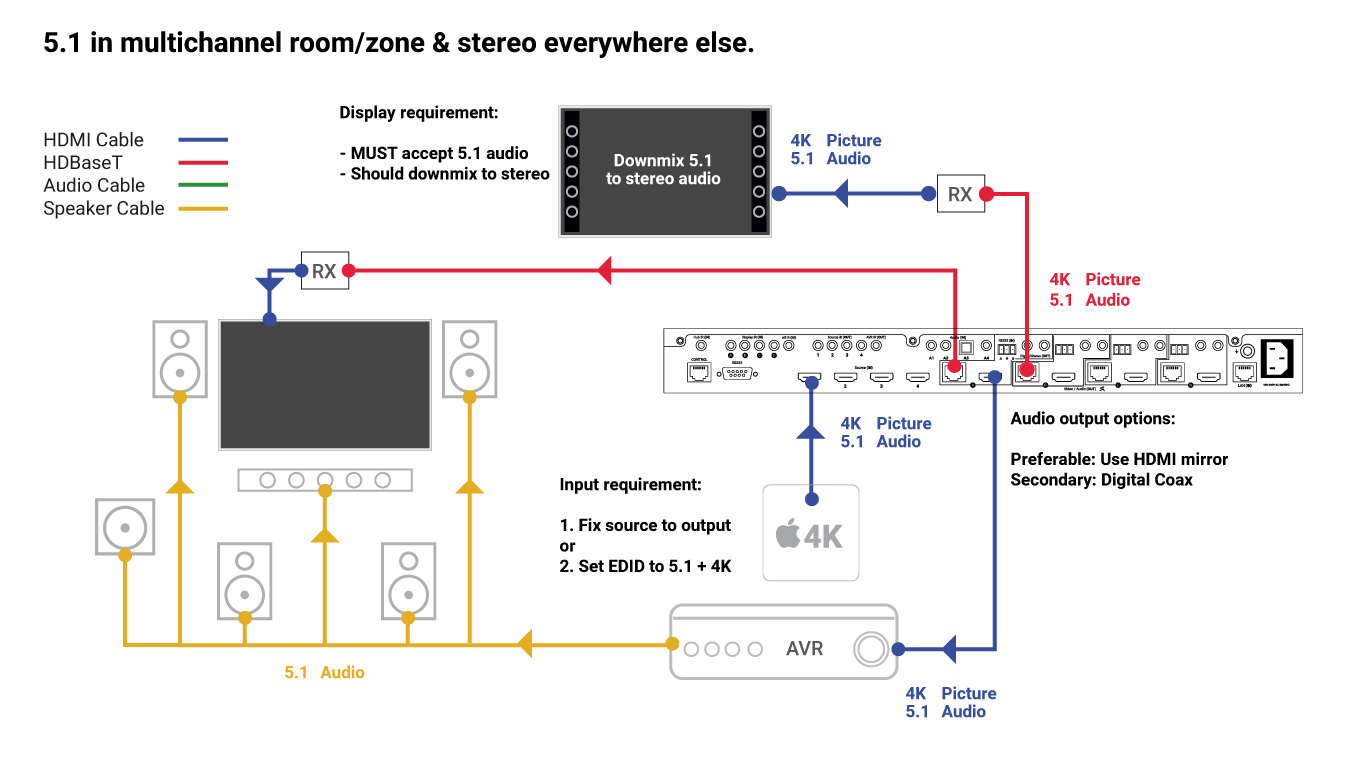
2. Multichannel soundbars
If you intend on fitting #2 then you will need to consider what capability your other rooms/zones can handle around your property. If your soundbar supports 5.1, then we suggest reading the guidance here.
What the guidance above says (briefly).
If you want your soundbar to output 5.1 then you will need to make sure your source is also set to output 5.1. When you do this all displays connected to MHUB will receive a 5.1 audio signal and if that display can’t decode 5.1 audio and downmix it into stereo then you will have an audio problem.
3. Multichannel (Immersive) soundbars
If you intend on installing a soundbar with this capability and require the source to be distributed then you will need additional hardware to manage the signal. We would recommend that you read Using MHUB and providing Dolby Audio (Atmos) and DTS (DTS-HD) audio.
Confused? Help is available, drop us an email for a fast response.